How I Run a Shopify SEO & GEO Audit on My Own Store

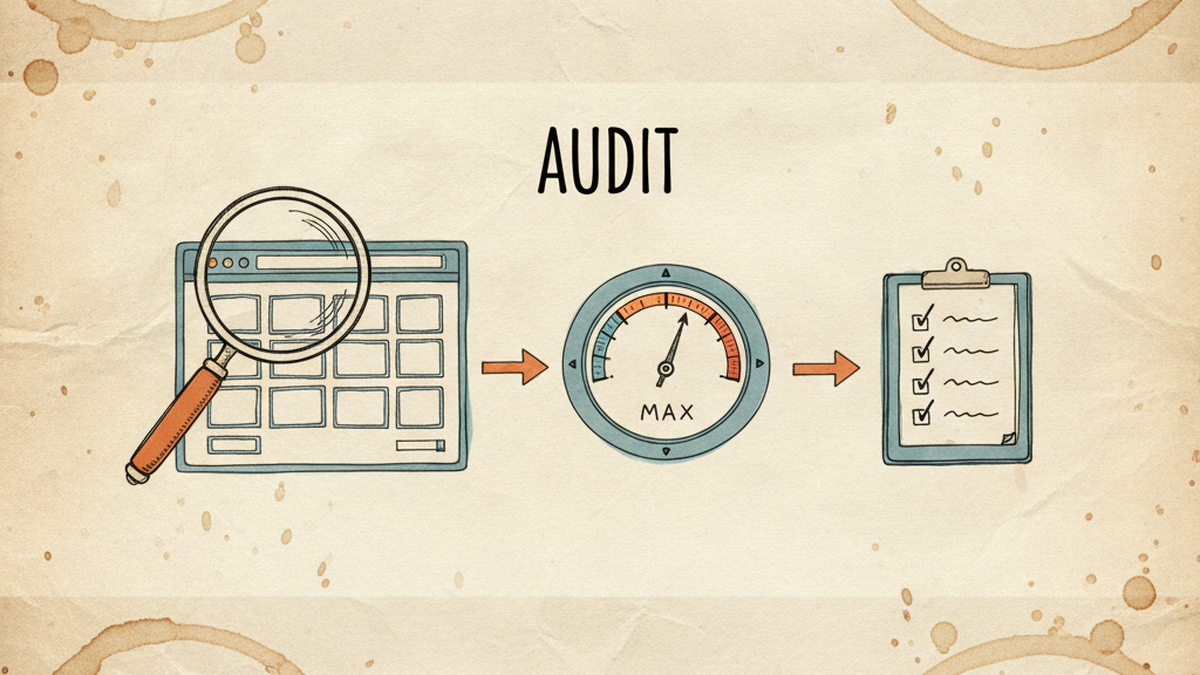
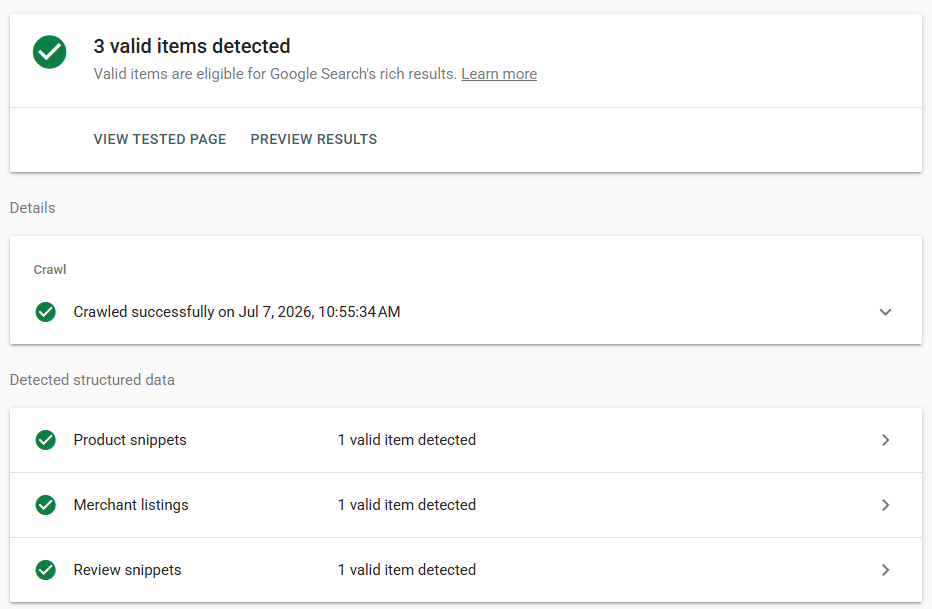
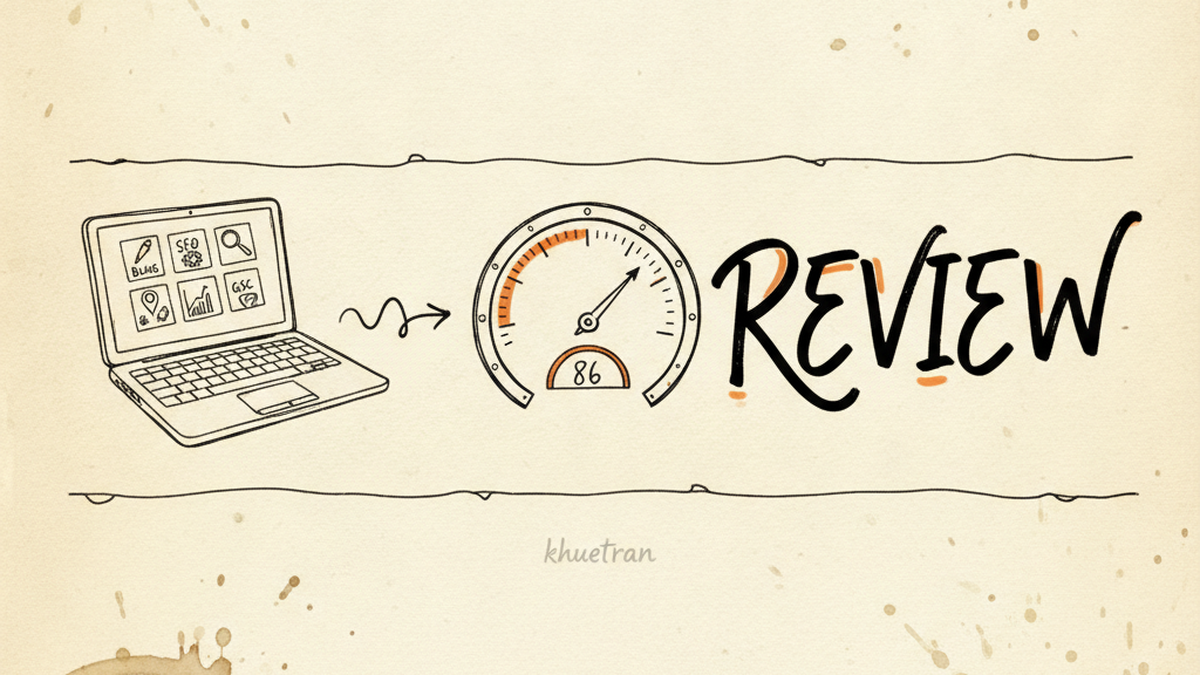
A magnifying glass over a Shopify store page, an audit score dial, and a checklist of fixes, illustrating a Shopify SEO and GEO audit

TL;DR

Most “Shopify SEO audit” results are app listings or agency lead funnels. This is the opposite: the exact, repeatable audit I run on stores I operate, scoring classic SEO and the GEO layer that decides whether AI search quotes your pages.

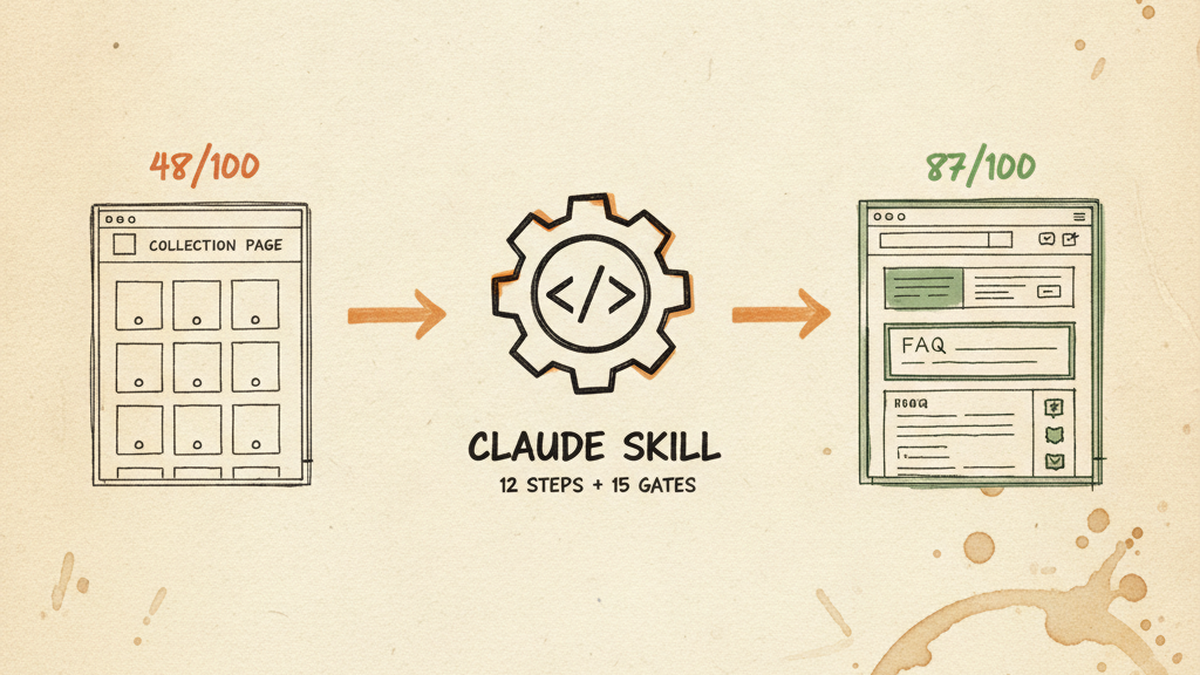
I score a store on a 100-point rubric, run it across the whole catalog to find the real gaps, prioritize the fixes that move the most pages at once, then re-score. An open-source tool I built does the heavy lifting. On one store I run, the pages I audited averaged 48 out of 100; the three I rebuilt landed at 95, 96, and 95.

Search “shopify seo audit” and you mostly get two things: an app promising a one-click score, or an agency offering a free audit that turns into a sales call. Useful, sometimes. But neither shows you the actual method, and almost none of them check whether your pages are ready for AI search.

I audit my own stores because I run the ad accounts and the SEO myself, so the audit has to be repeatable and honest, not a lead magnet. Below is the whole process: the rubric I score against, what it finds on a real catalog, the GEO half that standard audits skip, and the open-source tool I built so I do not have to do it by hand across hundreds of pages.

What is a Shopify SEO and GEO audit?

A Shopify SEO audit checks whether your pages can rank in Google: titles, structure, schema, internal links, speed. A GEO audit adds a second question that matters in 2026: can an AI system read and cite your pages? Both draw from the same content, so I run them as one pass rather than two.

The reason to combine them is overlap. Ahrefs, analysing 863,000 result pages, found that 38% of pages cited in Google AI Overviews also rank in the organic top 10 (Ahrefs, March 2026), and Google’s AI Mode alone passed 1 billion monthly users (Google, May 2026). Good SEO feeds AI citations, so a modern audit should measure both in one scorecard instead of treating GEO as a separate project. I wrote the full fix list in my Shopify SEO checklist; this piece is about the audit that tells you which fixes you actually need.

How do I score a store?

I score every page against a fixed 100-point rubric so the result is a number I can compare over time, not a gut feeling. Five categories, weighted by how much they move rankings and citations:

Category Points What it measures
Copy quality 20 Is there real, useful, on-topic copy, or an empty tagline?
SEO + commercial intent 25 Title, meta, headings, and whether the page matches what a buyer searches
Curation 20 Are the right products grouped, filtered, and sub-organized?
Technical + schema 15 Structured data, breadcrumbs, machine-readability (the GEO base)
UX + conversion 20 Hero image, layout, trust signals, mobile

Product pages get the same treatment with one addition: a dedicated GEO and AI-citation category, plus a feed-safety check I will come back to. The rubric is also tier-aware. A 4,000-product mega-hub is judged differently from a 20-product sub-collection, because a hub needs filters and a curated structure that a small collection does not. The point of scoring first is boring but important: you cannot prioritize what you have not measured.

What does the audit actually find?

Here is the uncomfortable part, from a real run. When I scanned 250 collections on a store I operate, close to none had structured data and about 40% had no hero image. On the six pages I then scored in full against the rubric, the mean was 48 out of 100, and the worst, a hub with roughly 4,000 products, scored 38: no hero image, no filters, no schema. These are not fringe pages, they are the ones a catalog leans on.

What made it useful was that the same gaps repeated, which meant one fix would work at scale. Six gaps came up across the pages I audited, whether I scanned them shallowly or scored them in full:

Most common gaps (share of collections missing each)

JSON-LD schema (250 scanned)~100%
Hero image missing (250 scanned)~40%
Meta description (6 deep-scored)6 of 6
Visible breadcrumb (6 deep-scored)6 of 6
Below-grid copy (6 deep-scored)6 of 6
Filters price-only (6 deep-scored)5 of 6

Source: my own audit (first-party). The 250-collection figures come from a shallow gap-scan; the “6” figures are from the full rubric audit of six pages. Above-grid copy was bimodal too: either empty or a long wall of text, almost never the 40 to 120 word band that reads well.

The schema gap was the one that stung, because it is both a ranking and a GEO problem, and it mirrored my blog side, where roughly 300 of 309 posts scored near zero on schema too. When one gap appears on nearly every page, it stops being a page-by-page fix and becomes a template fix, which is exactly the kind of thing an audit is supposed to surface.

The GEO half of the audit, and what most SEO audits skip

A standard SEO audit stops at rankings. The GEO half asks whether an AI system can parse and trust the page. Four checks I always run, with the nuance the hype leaves out.

Schema, for machine-readability, not magic. I check that Product, Collection, FAQ, and Breadcrumb schema exist and match what the page shows. But I am honest about why: Google states there is “no special schema.org structured data that you need to add” for its AI features (Google Search Central, December 2025). Schema earns rich results and clean machine-readable facts. It is not a switch that forces a citation.

The llms.txt check. I open the store’s /llms.txt. On Shopify you likely already have one: Shopify auto-generates an /agents.md file, and /llms.txt mirrors it unless you add a custom template (Shopify, May 2026). The audit item is not “create one,” it is “check what Shopify already serves and customize it only if the default is thin.”

The robots.txt check. GEO fails silently if you block the bots that feed AI answers. The trap is Google-Extended: blocking it keeps you out of Gemini training but does not affect your Google Search ranking (Google). Default Shopify robots.txt names none of these, so they are allowed. Make that a deliberate choice, not an accident.

Crawler Feeds
OAI-SearchBot ChatGPT search (allow)
PerplexityBot Perplexity search, not model training
Claude-SearchBot Claude search relevance
Google-Extended Gemini training only, not Search ranking

Product feed safety. On product pages I check that the Product and Offer schema mirror the visible price and availability exactly. Get it wrong and Google Merchant Center can disapprove the item, and an AI agent can quote a stale price, which is worse than not being quoted. This is the one GEO check that also protects your paid shopping feed.

What tools do I use, and the one I built

The honest, cheap answer first. Shopify Search & Discovery for the faceted filters most of my collections were missing. Google Search Console to see which pages already earn impressions, so I audit the ones with a pulse first. That covers the manual version.

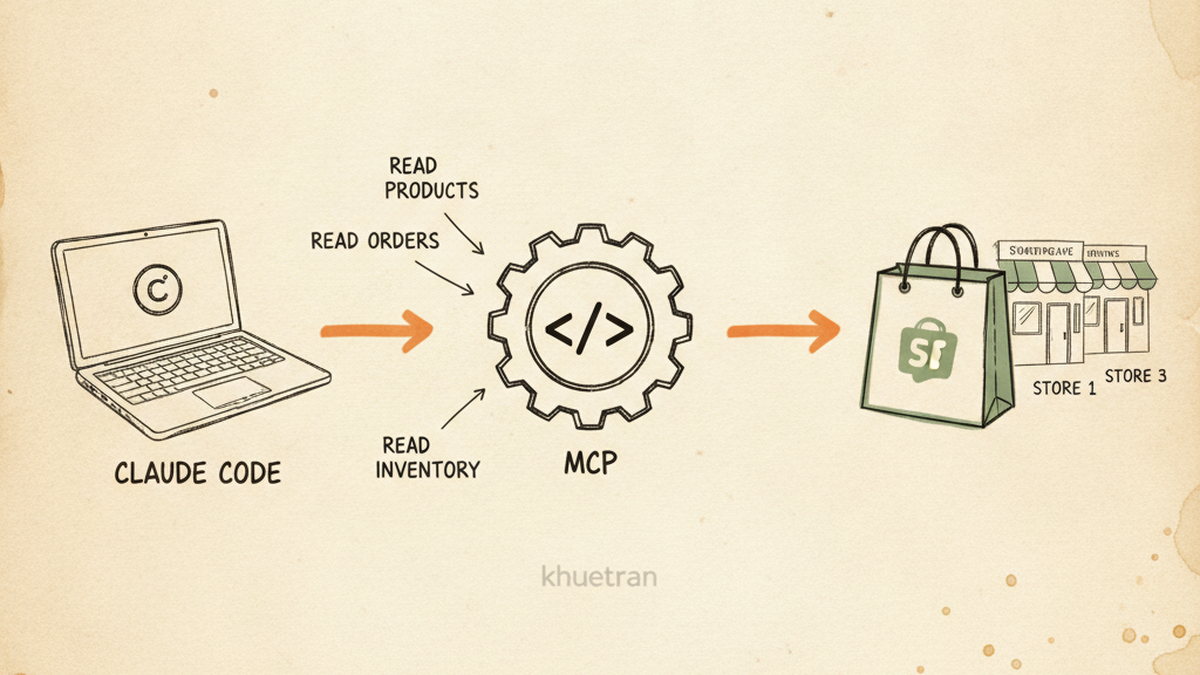
The problem is scale. Scoring 250 collections by hand, then rewriting copy and schema for each, is not realistic for a solo operator. So I built claude-shopify-growth, an open-source Claude Code kit (MIT licensed). It has two modules, collections and products, four skills each, and it runs the exact audit above:

  • collection-analyze scores one page on the 100-point rubric and lists the gaps.
  • collection-audit-pipeline scans the whole catalog, then deep-scores the worst pages and hands back a prioritized queue.
  • collection-content-deep writes the tier-aware copy, comparison table, and FAQ.
  • collection-mega-hub-optimize chains those into an end-to-end run from baseline to a target score, refusing to ship a page that fails any of 18 hard checks: title over 60 characters, hallucinated internal links, missing schema, and so on.

The product module mirrors this and adds the feed-safety gate, where the schema price and stock must match the visible ones byte for byte before the page ships. It is free, so here is the unglamorous truth: two of those hard gates exist because they broke on my own store. An FAQ rendered empty on a live page because the schema was nested the way the examples show, when the theme wanted a flat question-and-answer array. Another time deep content saved correctly but never appeared, because the collection used a custom theme template the code did not check for. Both are now gates that stop the run. That is the difference between a tool built in a tutorial and one built on a store that has to make money. The kit reaches the store the same way I described in how I connect Claude to my Shopify stores, and it is the Shopify sibling of my open-source Google Ads audit skill.

Worth it if you run dozens or hundreds of collections and the manual audit has become the bottleneck. Skip it if you sell ten products and can score them by hand in an afternoon. The rubric above is the real asset; the kit just runs it faster and refuses to ship a page that fails a gate.

How do I prioritize the fixes?

An audit that hands you 200 issues is a to-do list nobody finishes. The value is ranking them, and the rule is simple: fix what moves the most pages for the least work first. On my store that meant three levers, in order.

  1. One schema template edit. Because the JSON-LD gap was on nearly every collection, a single Liquid template change added structured data to more than 100 collections at once. Highest impact on the board.
  2. Turn on faceted search. Most collections offered only a price filter. Enabling brand, type, and size facets fixed curation across the catalog from one app, not one page.
  3. Bimodal copy. A 40 to 120 word intro above the grid plus a real FAQ below it, applied first to the collections that already earn impressions in Search Console.

Then I re-score, because an audit is not done until the number moves. Three collections I rebuilt this way went from 55, 52, and 52 on the rubric to 95, 96, and 95, and the biggest gains landed in the two categories the GEO layer cares about most: technical and schema, and SEO intent.

Three collections I rebuilt: rubric score, before → after (out of 100)

Collection A

before55
after95

Collection B

before52
after96

Collection C

before52
after95

Source: my own collection-analyze rubric (first-party), three collections I rebuilt. Separately, a six-page baseline audit averaged 48/100. This is a quality-score lift, not a traffic claim; the AI-citation upside I am still monitoring, with no hard number yet.

Frequently asked questions

What is the difference between an SEO audit and a GEO audit?

An SEO audit checks whether a page can rank in Google: titles, structure, schema, links, speed. A GEO audit adds whether an AI system can read and quote the page: machine-readable facts, answer-first passages, and crawler access. They share the same foundation, so I run them as one scored pass rather than two separate projects.

What tools do I need to audit a Shopify store’s SEO?

At minimum, Google Search Console to see what already earns impressions, and Shopify Search & Discovery for faceted filters. To score and fix at scale I use my own open-source kit, claude-shopify-growth, which runs the rubric and the fixes. A crawler like Screaming Frog also works for the pure technical pass.

How often should I audit my Shopify store?

A full catalog audit once or twice a year, plus a quick re-score of any collection you rewrite or that loses impressions in Search Console. The point is to catch template-level gaps, like missing schema, that silently affect every page at once.

Can I audit my store for AI search like ChatGPT, Perplexity, or AI Overviews?

Yes. Check that your key pages have accurate schema, answer-first copy, and a robots.txt that allows OAI-SearchBot, PerplexityBot, and Claude-SearchBot. Rank the page first, since AI answers heavily reuse top-ranking pages, then make it quotable. There is no paid shortcut.

Is the open-source audit tool free?

Yes, it is MIT licensed and free to use. It runs inside Claude Code and needs a Shopify MCP connector with Admin API access to read your store’s data and push the fixes. Your private product knowledge stays in a git-ignored folder and is never shipped.

The verdict: audit in this order

The whole audit is five steps, and the order is what makes it efficient:

  1. Score each page on the rubric, so you have a number instead of a hunch.
  2. Scan the whole catalog, so you find the gaps that repeat at the template level.
  3. Add the GEO checks: schema accuracy, the llms.txt or agents.md file, robots.txt crawler access, and product feed safety.
  4. Prioritize template-level fixes that touch 100 pages before the one-off tweaks that touch one.
  5. Re-score to confirm the number moved before you call the audit done.

Half your future visibility is an AI answer, not a blue link, so the GEO checks are no longer optional. But the sequence matters more than any single step: measure, find the repeats, fix the template, prove it.

If you run a handful of collections, you can do this by hand with the rubric above. If you run hundreds, the tool is on GitHub and it is yours to copy. Either way, once the audit is done, my Shopify SEO and GEO checklist is the fix list to work through.

About the author. I’m Khue Tran. I run several US Shopify stores and the ad accounts behind them, and I build small open-source AI tools for ecommerce operators. Everything here comes from real accounts and real production incidents, not theory. More write-ups at khuetran.com.


Shopify Merchant Listing Errors: What to Fix and What to Ignore

A client came to me with two scares from Search Console in the same week. Over a thousand product pages on their Shopify store had lit up with structured data issues, and organic clicks had just fallen off a cliff. I am a marketer, not a developer, but I fix these with a bit of Liquid and a lot of validating. Here is the whole audit, and the one decision that saved a week of pointless work: knowing which warnings to fix and which to leave alone.

Key Takeaways
– Google lists only name, image, and offers as required for merchant listings. brand, hasMerchantReturnPolicy, shippingDetails, and aggregateRating are recommended, so most “errors” are really optional warnings (Google Search Central, 2026).
– Diagnose before you fix. The scary click drop turned out to be a seasonal spike ending plus Search Console’s data lag, not a penalty.
– One theme JSON-LD block controls every product page. I fixed it once and over a thousand items got corrected in a single edit.
– Never fabricate aggregateRating or review markup. Fake reviews are a manual-action risk, and the star rating comes from aggregateRating alone.

What are Shopify “Merchant listing” errors, and do they hurt rankings?

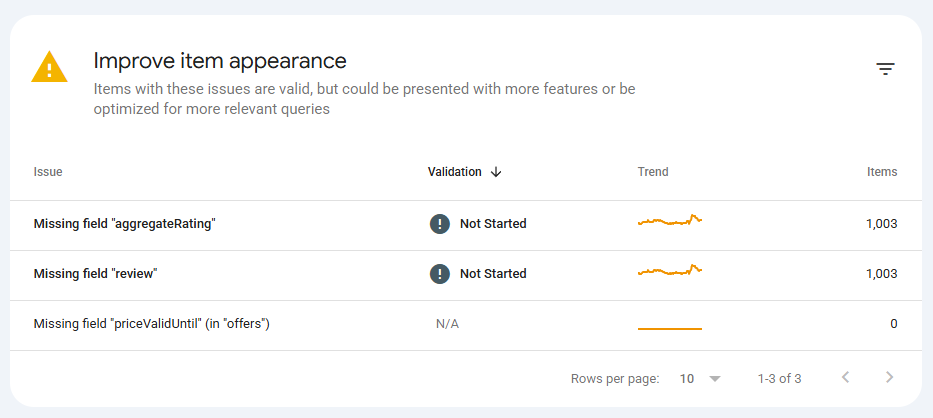
Merchant listing issues in Search Console are almost always warnings, not hard errors. Google’s own report files them under “improve item appearance” and states that the items are still valid, just eligible for more features. A merchant listing is a product result that can carry rich extras: a star rating, price, shipping, and return details. Structured data is the JSON-LD block in your page source that feeds those extras to Google. For Product structured data, only name, image, and offers are required. Everything else, including brand, hasMerchantReturnPolicy, shippingDetails, aggregateRating, and review, is recommended (Google Search Central, 2026).

That distinction matters, because a red icon reads like a fire and it usually is not one. However, a missing return policy will not deindex a page. What it costs you is the richer result: the star rating, price, shipping, and return badges that make a listing stand out in search and in the Shopping tab. So the target is not “clear every warning.” It is “earn the features worth earning.”

On this store, Search Console flagged five issues across the catalog: an invalid object type for brand, missing hasMerchantReturnPolicy, missing shippingDetails, an invalid string length in name, and missing aggregateRating. Each one touched just over a thousand products, which looks terrifying until you notice they all come from a single template.

Google Search Console Improve item appearance report listing missing aggregateRating, review, and priceValidUntil warnings across roughly 1,000 product items each

Was it a schema problem or a traffic scare?

The click drop was not a penalty and it was not the schema. It was a seasonal cluster ending, made worse by Search Console reporting two to three days behind. I only trusted that once the numbers agreed, and checking first saved the client from paying me to “fix” something that was never broken.

Here is the tell. When I pulled daily data, impressions and clicks had both climbed for two weeks, peaked, then dropped together right after a holiday. One seasonal article and its query cluster accounted for most of the loss. Its average position had not moved at all. Same rank, fewer searchers. The last two days of the window showed almost nothing, which is the signature of Search Console’s processing delay, not a real zero.

Seasonal Clicks and impressions fall together. Position line: flat. Demand gone, rank intact. Ranking loss Clicks slide down and stay down. Position line: rising (worse). You actually dropped. Reporting lag Steady, then the last 2 days crash. Not real: GSC is 2 to 3 days behind. Clicks Average position Illustrative shapes, not this store's numbers.
Three shapes of a traffic drop. The average-position line is what separates a seasonal dip from a real ranking loss.

The lesson is boring, and it is the most useful thing in this post: separate the traffic question from the schema question before you touch code. They landed in the same message and had nothing to do with each other.

How do you fix the errors in your theme’s Product schema?

All five issues lived in one place: the single application/ld+json block the theme renders on every product page. Fixing that block once corrected the whole catalog, because Shopify themes generate product schema from a shared section, not per product.

Here is what was wrong and how each piece got corrected:

  • brand used the wrong type. The theme output "@type": "Thing". Google wants a Brand (or an Organization). A one-word change fixed every product.
  • name ran too long on bundles. A few bundle products had titles past 150 characters because the title listed every free gift. Instead of renaming real products, I capped the schema field with Liquid’s truncate: 150. The storefront title stays long; only the structured data is trimmed.
  • The image URL was quietly broken. This one was invisible in the admin. The theme built the schema image from a Liquid variable that did not exist, so it emitted something like https:files/... instead of a real CDN URL. Every merchant listing effectively had no valid image. Pointing the code at product.featured_media fixed it.
  • Return, shipping, and price validity were simply missing. I added them from the store’s own policy pages, using real values, not guesses.

The broken image is the one most people miss, because nothing in Search Console says “your image is malformed.” It rendered fine on the page, since the page image and the schema image are built by different lines of code. A confident wrong value is worse than a blank, because you never think to check it.

A generalized version of the corrected block looks like this. Swap the return and shipping values for the store’s own policies:

{%- assign price_valid_until = 'now' | date: '%s' | plus: 31536000 | date: '%Y-%m-%d' -%}
{%- capture rating_avg -%}{{ product.metafields.reviews.rating.value }}{%- endcapture -%}
{%- capture rating_count -%}{{ product.metafields.reviews.rating_count.value }}{%- endcapture -%}
{%- assign rating_avg = rating_avg | plus: 0.0 | round: 2 -%}
{%- assign rating_count = rating_count | plus: 0 -%}
<script type="application/ld+json">
{
  "@context": "https://schema.org/",
  "@type": "Product",
  "name": {{ product.title | truncate: 150 | json }},
  "image": [{% if product.featured_media %}{{ product.featured_media | image_url: width: 1200 | prepend: 'https:' | json }}{% endif %}],
  "sku": {{ product.selected_or_first_available_variant.sku | json }},
  "brand": { "@type": "Brand", "name": {{ product.vendor | json }} },
  {% if rating_count > 0 %}
  "aggregateRating": {
    "@type": "AggregateRating",
    "ratingValue": {{ rating_avg | json }},
    "reviewCount": {{ rating_count | json }},
    "bestRating": 5
  },
  {% endif %}
  "offers": {
    "@type": "Offer",
    "priceCurrency": {{ cart.currency.iso_code | json }},
    "price": {{ product.price | divided_by: 100.0 | json }},
    "priceValidUntil": "{{ price_valid_until }}",
    "availability": "https://schema.org/{% if product.available %}InStock{% else %}OutOfStock{% endif %}",
    "hasMerchantReturnPolicy": {
      "@type": "MerchantReturnPolicy",
      "applicableCountry": "US",
      "returnPolicyCategory": "https://schema.org/MerchantReturnFiniteReturnWindow",
      "merchantReturnDays": 14,
      "returnMethod": "https://schema.org/ReturnByMail",
      "returnFees": "https://schema.org/ReturnFeesCustomerResponsibility"
    },
    "shippingDetails": {
      "@type": "OfferShippingDetails",
      "shippingRate": { "@type": "MonetaryAmount", "value": "0", "currency": "USD" },
      "shippingDestination": { "@type": "DefinedRegion", "addressCountry": "US" },
      "deliveryTime": {
        "@type": "ShippingDeliveryTime",
        "handlingTime": { "@type": "QuantitativeValue", "minValue": 1, "maxValue": 3, "unitCode": "DAY" },
        "transitTime": { "@type": "QuantitativeValue", "minValue": 2, "maxValue": 5, "unitCode": "DAY" }
      }
    }
  }
}
</script>

One habit that paid off: I staged the change on a side template first, viewed it through a preview parameter, and validated the rendered JSON before touching the live file. On a catalog this size, a broken template is a bad way to find a typo. If you want the background on how I edit theme files through the API instead of the theme editor, I wrote that up in connecting Claude to Shopify.

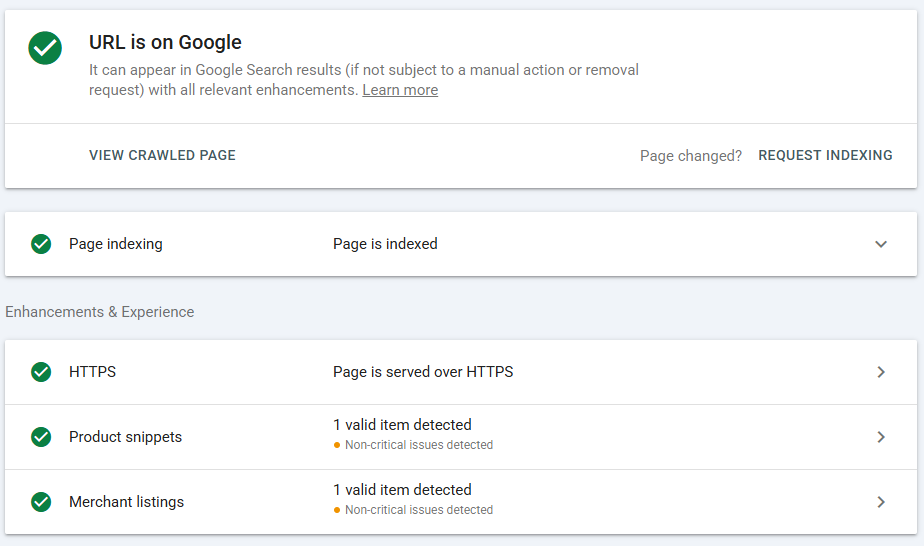
After the edit, Google’s URL Inspection confirmed the two experiences that matter for a store, product snippets and merchant listings, both reading as valid.

Google URL Inspection result showing the page is on Google with Product snippets and Merchant listings both detected as valid, with only non-critical issues remaining

Feed or markup: where should shipping and returns actually live?

For shipping and returns, the store’s Merchant Center or Search Console settings beat on-page markup, so if the store sells through Shopping it probably already has shipping covered in the feed. You still add the markup, because the two sources work together and the Search Console report reads the markup, not the feed.

Google publishes the exact order of precedence, strongest to weakest (Google Search Central, shipping policy, 2026):

1. Content API (account-level shipping settings)

2. Merchant Center or Search Console settings

3. Product-level markup

4. Organization markup

Strongest at top. Source: Google Search Central, shipping policy structured data, 2026.
When two sources disagree on shipping, the higher tier wins.

In practice, two things follow. First, if a shipping value ever disagrees between the feed and the markup, the feed wins, so keep them consistent. Second, the Merchant listings report in Search Console is scored against your on-page markup. That is why a store with perfectly good Merchant Center shipping can still show a “missing shippingDetails” warning for months. The feed satisfies Shopping; the markup satisfies the report and plain web results. You want both. Google’s product docs note that some result types even blend the two, using feed pricing when the on-page markup omits it.

How do you get star ratings into the product schema?

Star ratings come from aggregateRating, and that field should read from the store’s review app data, never from a number you typed. aggregateRating is the summary object, an average score plus a review count, that produces the visible stars. On this store the review app writes two Shopify metafields per product, an average and a count, and the theme reads them straight into the schema. The moment a product has real reviews, the stars appear.

Two gotchas cost me time, and both are worth knowing before you hit them:

  • A metafield came back sometimes as a number and sometimes as a string. One product stored its average as 5, another as "0". In Liquid, comparing a string to a number throws an error and quietly breaks the whole JSON block on that page. The fix is to coerce every value with a filter like | plus: 0.0 before you compare or print it.
  • The rating metafield is an object, not a plain number. The review app stored it as Shopify’s rating type, which is a small object with a value and a scale, not a bare float. Capturing the rendered value into a string first, then coercing it, handled both shapes without special-casing.

There is a real payoff to reading ratings from a metafield instead of a review app widget. This client was mid-migration from a legacy review app to a new one, so I pointed the schema at the new app’s metafield with a fallback to the old one. The stars kept showing through the whole switch, and once the new reviews finished importing, the old source just went quiet. Schema that reads data survives a platform change. Schema with a number typed into it does not.

Once real reviews were flowing, the Rich Results Test returned the clean end state: product snippets, merchant listings, and review snippets, all valid on one page.

Rich Results Test showing three valid items detected on a single product page: Product snippets, Merchant listings, and Review snippets

Which warnings should you fix, and which should you ignore?

Fix the ones that apply to every product. Ignore the ones that can never reach 100 percent. Search Console validation is all-or-nothing per issue, so trying to validate a warning that will always have unaffected pages is a trap that burns days.

Here is the call I made, and why:

Search Console warning Fix it? Why
Invalid object type for brand Yes One-word markup bug, corrects every product at once
Invalid string length in name Yes Cap the schema field at 150 characters, no product renaming
Missing hasMerchantReturnPolicy Yes Real listing feature, one block covers the catalog
Missing shippingDetails Yes Same, and the report stays flagged even with feed shipping
Missing priceValidUntil Yes Trivial, add a rolling date one year out
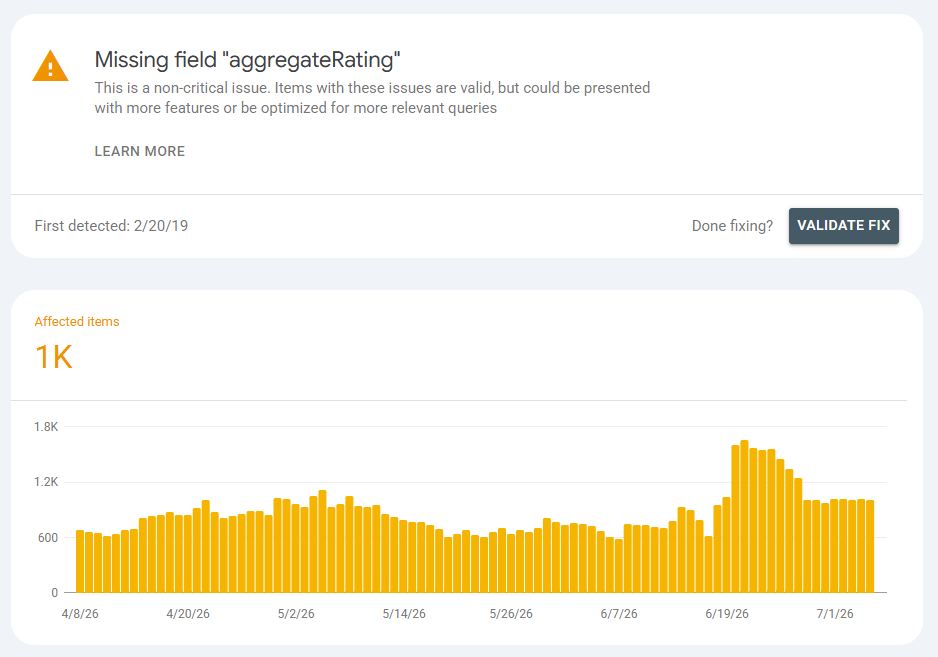
Missing aggregateRating Only where real Emit it only for products with genuine reviews, never fake it
Missing review (individual reviews) Safe to ignore The star rating comes from aggregateRating, full review objects add little visible benefit

Search Console issue detail for a missing aggregateRating warning, marked non-critical, with a Validate Fix button and a trend chart of affected items

Two traps I hit personally. First, returnFees has to use one of Google’s accepted enum values. I used RestockingFees, which is a real schema.org value, and the Rich Results Test rejected it as an invalid enum. Switching to ReturnFeesCustomerResponsibility passed on the next test. A valid schema.org value is not automatically a valid Google value, and that mismatch is a frustrating way to lose an afternoon.

Second, do not click “Validate Fix” on the review or aggregateRating warnings. Most catalogs have thousands of products with zero reviews, so those warnings will always find affected pages and the validation refuses to start, with a “cannot continue” message. That is expected. Let them fall on their own as real reviews come in.

Verdict: fix the catalog-wide stuff, ignore the rest

Worth doing in-house if someone on the team can edit a theme’s Liquid: back up the section, correct the one JSON-LD block, stage it on a side template, validate, then publish and request validation only on the issues that touch every product. That is a one-evening job and it moves the whole catalog at once.

Not worth doing by hand if theme code is not where anyone wants to spend the night. The failure mode here is a broken template across the entire catalog, which is worse than the warnings you started with. This is the kind of small, boring, high-value task worth handing to a script. It is the same move I made when I handed one client’s ad account to a tool I built to find its money leaks.

Either way the pattern is the same: diagnose the traffic separately from the schema, fix the theme’s one shared block so the catalog moves together, let the feed own Shopping while the markup cleans up web search, and read ratings from real review data instead of typing a number. Clear the warnings worth clearing, and let the rest resolve themselves. That is the audit, start to finish.

Frequently Asked Questions

Do Shopify merchant listing warnings hurt my Google rankings?

No. Google files them under “improve item appearance” and confirms the items are still valid (Google Search Central, 2026). They change how rich your result looks, such as showing stars, price, and shipping, not whether the page can rank. Fix them to win features, not to avoid a penalty.

Do I need shipping markup if my Merchant Center feed already has shipping?

For Google Shopping, the feed covers you, because Merchant Center settings outrank on-page markup in Google’s precedence order. You still add markup, because the Search Console Merchant listings report reads your markup and regular web results can use it too. Keep the two consistent so they never disagree.

How do I add star ratings without breaking Google’s rules?

Read aggregateRating from the store’s real review app data, usually a Shopify metafield holding an average and a count, and only emit it when a product actually has reviews. Never hardcode a rating or invent reviews. Fabricated review markup is a documented manual-action risk, and the visible stars come from aggregateRating alone.

Why does “Validate Fix” fail on the review warning?

Because validation is all-or-nothing per issue. If any affected page still lacks the field, it will not start. Most stores have many products with no reviews, so the review and aggregateRating warnings always have affected pages. Skip validation on those two and validate only the issues you fixed catalog-wide.

How long until Search Console clears the fixed warnings?

Plan for one to three weeks. After you click “Validate Fix,” Google re-crawls affected URLs over days, and the report count drops gradually. You can confirm a fix instantly on any single page with the Rich Results Test, which reads the live markup without waiting for the next crawl.


External sources accessed and verified on 2026-07-07.

Sources
– Google Search Central, Merchant listing (product) structured data, retrieved 2026-07-07, https://developers.google.com/search/docs/appearance/structured-data/merchant-listing
– Google Search Central, Product structured data, retrieved 2026-07-07, https://developers.google.com/search/docs/appearance/structured-data/product
– Google Search Central, Merchant shipping policy structured data, retrieved 2026-07-07, https://developers.google.com/search/docs/appearance/structured-data/shipping-policy
– Google Search Central, Organization structured data, retrieved 2026-07-07, https://developers.google.com/search/docs/appearance/structured-data/organization

The Shopify SEO Checklist for 2026 (and the GEO Layer Most Guides Skip)

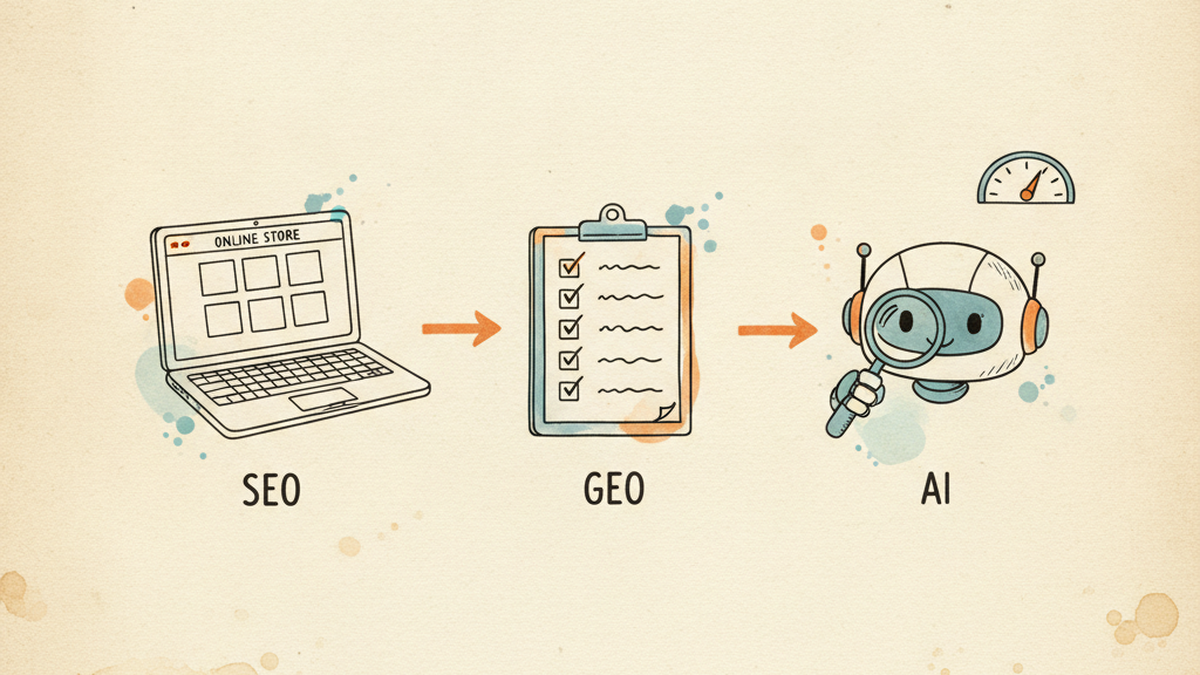
A Shopify store page, an optimization checklist, and an AI assistant reading the page, illustrating SEO plus GEO

TL;DR

The classic Shopify SEO checklist still earns most of your rankings, so do it first. But in 2026 a second job matters too: getting your pages read and cited by AI search (ChatGPT, Perplexity, Google’s AI Mode). That is GEO, and almost every “Shopify SEO checklist” on page one ignores it.

Here is both, in order, from someone who ran it across a real store: a multi-brand catalog of about 250 collections and tens of thousands of SKUs. On my own 100-point rubric the pages I started with averaged 48. Three I fully rebuilt landed at 95, 96, and 95. I will also show you where the GEO hype is wrong, using Google’s own documentation.

Search “shopify seo checklist” and you get a wall of solid, near-identical lists: title tags, alt text, sitemaps, page speed. All correct. All written before AI search mattered, and none of them mention it. Meanwhile a real share of my buyers now start a product question inside ChatGPT or Google’s AI answers, not a blue-link results page.

So this checklist has two halves. The first is the classic on-page work that still does the heavy lifting. The second is the GEO layer that decides whether an AI answer quotes your store or a competitor’s. I run both on stores I operate, and I build the open-source tooling that automates the boring parts, so everything below is what I actually do, not theory.

What is a Shopify SEO checklist in 2026, and why does it need a GEO layer?

A Shopify SEO checklist is the set of on-page and technical steps that make a store rank in Google. In 2026 it needs a second column, because ranking a page and getting that page cited in an AI answer are now two different jobs. Google’s AI Mode alone passed 1 billion monthly users (Google, May 2026), and ChatGPT reports around 900 million weekly users (OpenAI, reported February 2026).

The good news for anyone who has done SEO: the two jobs overlap heavily. Ahrefs, analysing 863,000 result pages, found that 38% of pages cited in Google AI Overviews also rank in the organic top 10 (Ahrefs, March 2026). Good SEO still feeds AI citations. GEO is not a replacement for the checklist below, it is a layer on top of it.

I did not learn this from a webinar. When I first audited my own store with a 100-point rubric I built, across a sample of 250 collection pages, the picture was ugly and consistent: roughly 40% of collections had no hero image at all, and effectively 100% were missing structured data. The mean score across my six deepest audits was 48 out of 100. That gap is exactly what this checklist closes.

SEO vs GEO: what actually changed?

GEO, sometimes written “AI GEO” or “generative engine optimization,” is the practice of making your content easy for AI systems to read, trust, and quote. The shift is the unit of value. Classic SEO competes to rank a whole page. GEO competes to have a specific passage lifted into an answer. Same content foundation, different finish.

Dimension Classic SEO GEO (AI search)
Goal Rank the page in Google Get quoted in an AI answer
Unit The whole page A single passage or fact
Who reads it Googlebot + a human clicker AI crawlers + a model summarising
Wins on Relevance, links, speed Clarity, structure, machine-readable facts
Measured by Rankings, organic clicks Citations, AI referral traffic

Keep that overlap in mind as you read. Nothing in the GEO half asks you to undo the SEO half. It asks you to make the same page cleaner for a machine.

The classic Shopify SEO checklist (the foundation that still ranks)

This is the part every guide covers, so I will keep it tight and add what I actually saw break on a real catalog. Do all of it before you touch the GEO layer, because AI systems mostly cite pages that already rank, and none of this works if the fundamentals are missing.

  1. One keyword-front title per page, under 60 characters. Put the term a buyer types first. On my store the biggest recurring gap was not bad titles, it was no consistent title convention across collections, so I enforce one template store-wide.
  2. A written meta description. Six of my six deepest-audited collections had none, so Google wrote its own. Write your own for anything with commercial intent.
  3. One H1, then a logical H2/H3 outline. Structure is not decoration. It is how both Google and an AI model figure out what a page is about.
  4. Descriptive alt text on every product and hero image. Roughly 40% of my audited collections had no hero image at all, which is a ranking and a trust problem before it is an accessibility one.
  5. Clean URLs and verified internal links. Every internal link should point to a real, live handle. When I automate this I verify each link against live store inventory so nothing points to a dead collection.
  6. Collection and product copy with real depth. The pattern I kept finding was bimodal: pages had either zero body copy or a 300-word wall. The band that works is a 40 to 120 word intro above the grid, plus a genuine FAQ below it.
  7. An XML sitemap, and no-index on thin or duplicate pages. Shopify generates the sitemap; your job is to stop indexing near-duplicate collections that split your own ranking signal.
  8. Core Web Vitals and theme speed. Trim apps you do not use. Each one adds script weight that a buyer on mobile pays for.

If you want the deeper version of the collection-page work, I wrote a separate walkthrough on optimizing Shopify collection pages. The short version: fix structure, copy, and internal links first, because they are the base every AI system reads from.

The GEO layer nobody’s adding to their Shopify checklist

Most vendor blogs get the next part wrong, and I would rather trust primary sources than hype. The GEO layer is smaller and more boring than the “AI-powered” pitches suggest, and one popular tactic is, per Google, unnecessary. Add these five in order.

1. Structured data, for the right reason

Add schema to your key templates: Product, Collection, FAQ, and Breadcrumb. It makes prices, availability, ratings, and questions machine-readable, which is the whole game for AI. But be precise about why. Google states plainly that for its AI features there is “no special schema.org structured data that you need to add” (Google Search Central, updated December 2025). Schema earns you rich results and clean machine-readable facts. It is not a secret switch that forces an AI to cite you.

On the effort side, this is the highest-leverage item on the page. On my store, every audited collection was missing schema. I fixed all of them with a single JSON-LD template edit in the theme, which pushed the fix across more than 100 collections at once. On my rubric, the Technical and Schema category on a rebuilt collection jumped from 5 out of 15 to 14. One template, one afternoon, catalog-wide.

2. Answer-first copy that a model can lift

Open each important section with a direct 40 to 60 word answer, then expand. AI systems quote self-contained passages, so a section that answers its own heading in the first sentence is far more quotable than one that warms up for three paragraphs. Keep your product and brand names consistent too. Entity clarity, using the same name for the same thing every time, is how a model learns what you are.

Concretely, on a collection page I stopped opening with “Welcome to our collection of premium products” and started with “This collection has 120 gel polish colors, sorted by finish and brand, all in stock and shipping from the US.” The first version says nothing a model can use. The second answers the three questions a buyer and an AI both ask, what is here, how is it organized, and can I get it, in one sentence. That is the whole move, repeated across every page.

3. llms.txt on Shopify: what is real, and what Shopify already did for you

llms.txt is a proposal from Answer.AI (September 2024) for a plain-text file that tells AI tools what your site is about. It is a proposal, not an adopted standard, so treat vendor claims about it with care.

Two things most Shopify checklists get wrong here. First, Google says you do not need it: its 2026 guidance states you do not have to create llms.txt, “AI text files,” or special markup to appear in Search or its AI features (Google Search Central, updated June 2026). Second, if you are on Shopify you likely already have one. Shopify now auto-generates an /agents.md file, and /llms.txt plus /llms-full.txt mirror it unless you add a custom theme template (Shopify, May 2026). Open your-store.myshopify.com/llms.txt right now and you will probably see it.

I checked two stores I run, and they served two different files. The first was Shopify’s default: a short block of agent instructions that points AI shopping assistants at the Universal Commerce Protocol (co-developed by Shopify and Google, endorsed by Wayfair, Target, and Etsy) and tells them how to transact through the Shop skill. No products, just protocol. The second store served a customized version: a one-line store description, a keyword line, then a bulleted list of the main collections with their URLs, plus a “last updated” date. That second file is a plain map of the catalog, the kind of thing an AI can read in one pass to understand what the store sells.

Neither needed hand-coding. So the honest checklist item is not “generate an llms.txt.” It is “open your own /llms.txt, see which of those two you are serving, and write the catalog-map version only if the default does not describe your store well.”

4. Let the right AI crawlers in

GEO fails silently if your robots.txt blocks the bots that feed AI answers. This is the most misunderstood corner of the topic, so here is the cheat-sheet, from each vendor’s own documentation.

Crawler Who What it feeds
OAI-SearchBot OpenAI ChatGPT search results (allow it)
GPTBot OpenAI Model training (your call)
PerplexityBot Perplexity Perplexity search, not model training
Claude-SearchBot Anthropic Claude search relevance
Google-Extended Google Gemini training only, not Search ranking

The trap is Google-Extended. Block it and you keep your content out of Gemini training, which is a fair choice, but it does not affect your Google Search ranking at all (Google). Plenty of store owners block it thinking they are protecting rankings. They are not. Default Shopify robots.txt names none of these bots, so they are all allowed. If you want to be in AI search, that default is fine. Just make the choice on purpose.

5. Product pages: schema that matches the shelf

Product pages are the money pages, and they carry a GEO rule the collection pages do not: the Product and Offer schema must mirror the price and availability a shopper actually sees, exactly. Get this wrong and two things break at once. Google Merchant Center can disapprove the item for a price mismatch, and an AI agent reading your structured data can quote a stale price to a buyer, which is worse than not being quoted at all. When I optimize a product page I gate on this: the schema price and stock status have to match the visible ones byte for byte before the page ships.

The other half is the copy. Manufacturer boilerplate is the same text on a thousand other stores, so it gives an AI no reason to cite you specifically. A benefits-first description with a real specs table, a “who it is for” line, and an honest FAQ gives both Google and a model something only your page has. Same discipline as the collection work, applied to the page where the sale happens.

What tools do I use to run this at scale?

Honest answer, cheapest first. Shopify Search & Discovery for faceted filters, which most of my collections were missing. Google Search Console to see which pages already earn impressions, so you optimize the ones with a pulse first. A theme schema edit for the catalog-wide JSON-LD fix above.

And the kit I built, because doing this by hand across hundreds of collections is not realistic. It is an open-source Claude Code project, claude-shopify-growth (MIT licensed), that scores a page on a 100-point rubric covering both SEO and GEO, then rewrites copy, builds the schema bundle, and verifies every internal link against live inventory. It refuses to ship a page that fails any of 18 hard checks: title over 60 characters, hallucinated links, missing schema, and so on.

I am not selling it, it is free, so here is the unglamorous part. Two of those hard checks exist because they broke in production on my own store. An FAQ rendered empty on a live page because the schema was nested the way schema.org examples show, when Shopify’s theme wanted a flat question-and-answer array. Another time deep content saved correctly but never appeared, because the collection used a custom theme template the code did not check for. Both are now gates that stop the run. That is what building on your own store teaches you that a tutorial cannot. The automation behind all of it is Claude talking to Shopify, which I covered in how I connect Claude to my Shopify stores.

Does the GEO layer actually work?

This is the part I have to be honest about, because my voice is not the hype kind. What I can put a file behind is a quality-score lift, not a traffic miracle. On my own 100-point rubric, the collections I started with averaged 48. Three I fully rebuilt using the same collection-page playbook plus the GEO layer scored 95, 96, and 95. The biggest category jumps were exactly the GEO-adjacent ones: Technical and Schema, and SEO intent match.

Collection (rebuilt) Rubric before Rubric after
Collection A 55 95
Collection B 52 96
Collection C 52 95

Composite rubric score, before and after (out of 100)

Baseline (audit mean)

48
Collection A (rebuilt)

95
Collection B (rebuilt)

96
Collection C (rebuilt)

95

Source: my own collection-analyze rubric (first-party). Baseline is the six-collection audit mean; A, B, and C are three collections I rebuilt with the checklist plus the GEO layer.

What about the AI citations themselves? Those pages now rank on page one and I do see them surfaced in AI answers and recommendations. But I will not hand you a citation-rate number, because I do not have a clean before-and-after measurement of it yet, and a confident wrong number is worse than an honest gap. Treat GEO as compounding, not instant. The score lift is the receipt I can show today; the AI-citation upside is the trend I am still measuring.

Frequently asked questions

What is the difference between SEO and GEO for Shopify?

SEO makes a page rank in Google’s results. GEO makes a page easy for an AI system to read and quote in an answer. They share the same foundation, structured, well-written, crawlable pages, but GEO optimizes for a passage being lifted into an AI response rather than a page ranking on its own.

Do I need an llms.txt file for my Shopify store?

Probably not by hand. Shopify auto-generates an /agents.md file, and /llms.txt mirrors it unless you customize the template. Google also states you do not need llms.txt to appear in its AI features. Check what your store already serves at /llms.txt, then customize only if the default does not describe your catalog well.

How do I get my Shopify pages cited by ChatGPT, Perplexity, or Google AI Overviews?

Rank the page first, since AI answers heavily reuse top-ranking pages. Then make it quotable: answer-first passages, consistent entity names, Product and FAQ schema, and a robots.txt that allows OAI-SearchBot, PerplexityBot, and Claude-SearchBot. There is no paid shortcut and no magic file.

Does schema markup help with AI search?

It helps by making your facts machine-readable and by earning rich results, which support rankings that AI answers draw from. But Google is explicit that no special schema is required for its AI features, so add schema for the real benefits, not because a blog promised it forces citations.

Is the classic SEO checklist still worth doing in 2026?

Yes, and it is still where most of the return is. Roughly 38% of pages cited in Google AI Overviews also rank in the organic top 10, so classic SEO is the on-ramp to AI visibility, not a separate track you can skip.

The verdict: what to do, in order

Do the eight classic items first. They are table stakes and they feed everything else. Then add the GEO layer in this order for the fastest return: schema across your key templates (one theme edit, catalog-wide), answer-first copy on your top pages, a quick look at what Shopify already serves at /llms.txt, and a robots.txt you have chosen on purpose. Skip the paid “GEO tools” that promise citations for a fee, because the two authorities that matter, Google and your own analytics, both say the work is structure and clarity, not a magic file.

If you run more than a handful of collections, the checklist stops being a manual job. That is the gap my open-source kit fills, and it is yours to copy. If you would rather see the paid-side of my operator work, I also wrote up the wasted spend I found auditing my own Google Ads. Same principle either way: run it on a real store, publish the receipts.

About the author. I’m Khue Tran. I run several US Shopify stores and the ad accounts behind them, and I build small open-source AI tools for ecommerce operators. Everything here comes from real accounts and real production incidents, not theory. More write-ups at khuetran.com.


I Audited My Own Google Ads With a Tool I Built. It Found 4 Money Leaks.

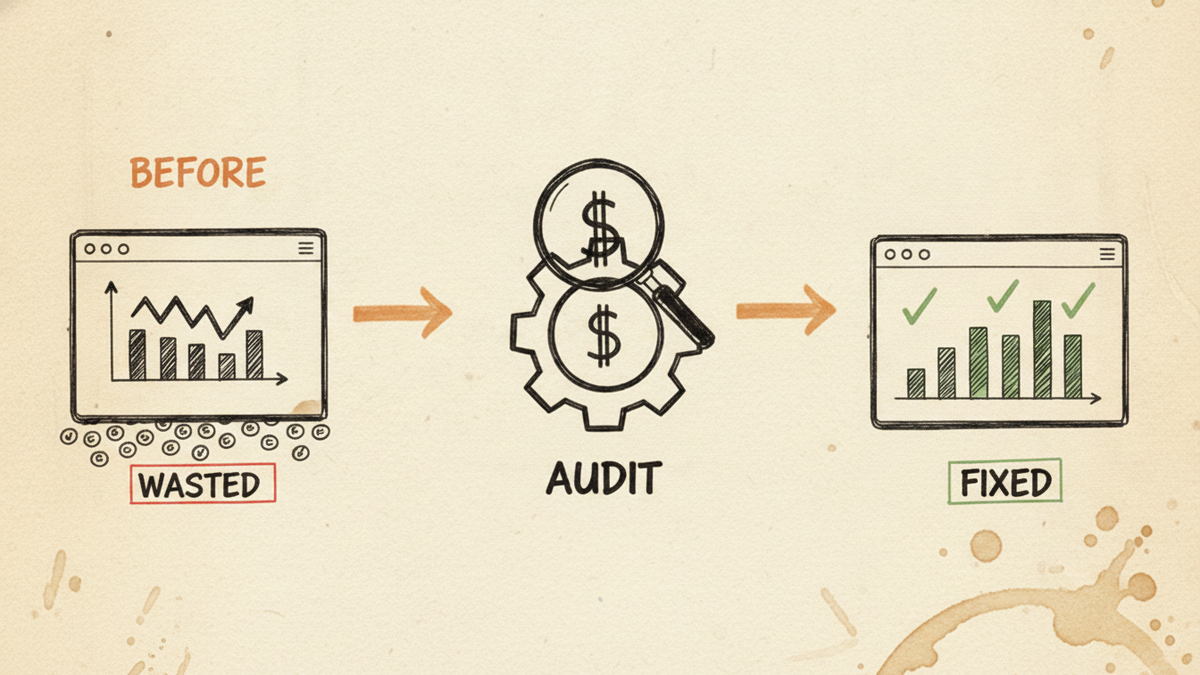
Hand-drawn before-and-after sketch: a Google Ads account leaking coins labeled WASTED, run through an AUDIT gear with a dollar sign, ending in a FIXED account with green check marks.

Key takeaways

  • I run several US ecommerce stores and built a Claude skill to audit my own Google Ads. On one account (about $14,000 in spend over 30 days, blended 3.85x ROAS), it flagged ~$1,282/month in concrete recoverable spend, with a directional ceiling near 31% of total spend.
  • Leak 1 (geography): ~$924/month went to states that search and click but barely convert; one state had literal zero conversion value.
  • Leak 2 (Performance Max cross-serving): ~$1,170/month on 2,164 clicks that converted zero times, across 102 auto-generated search categories, even though the campaign already had 111 negative keywords.
  • Leak 3 (branded cannibalization): my brand-name clicks cost ~$0.30 in a dedicated branded campaign versus $2-4 on non-branded terms. Letting Performance Max absorb brand searches means overpaying to buy back customers who were already looking for me.
  • Leak 4 (ad schedule): the account ran with zero time-of-day bid adjustments. A handful of hours pulled clicks at 0.4-0.6x ROAS, roughly $789/month on one campaign alone.
  • None of this showed up in the platform’s own “optimization score.” You have to go looking.

Why I audit my own accounts instead of trusting the dashboard

I am not an agency. I run the stores and the ad accounts myself, day to day. That is the whole reason I wrote this.

For a long time my routine was manual. Every morning I spent close to an hour per ad account pulling numbers and stitching together what happened yesterday, then a half-day whenever I wanted to research and launch a new campaign. Across three accounts that is three hours of report-reading before I have made a single decision, with the data scattered across the store, Merchant Center, and Google Ads.

So I built a Claude skill that reads the account through the API and does the first pass for me. Now the morning check is 10 to 20 minutes for all three sites, most of it automated, and it surfaces the things I would never catch by clicking around. Below are the four it found on one account. The numbers are real; I have anonymized the store.

Where the money leaked, per month (one ecommerce account) Horizontal bar chart of monthly recoverable Google Ads spend by leak: Performance Max cross-serving about $1,170, no-convert states about $924, ad-schedule hours about $789. The leaks overlap; the concrete non-overlapping recoverable figure was about $1,282 per month. Source: my own account, 30-day audit. Where the money leaked (per month) One ecommerce account, 30-day audit. Bars overlap, so the bankable non-overlapping total was ~$1,282/mo. $400 $800 $1,200 PMax cross-serving $1,170 No-convert states $924 Ad-schedule hours $789

Here is the whole account at a glance before I break down each leak:

Leak ~$/month Root cause Fix How to check
No-convert states ~$924 Bidding into states that click but do not buy Exclude or bid-down the dead states Locations report: conv. value / cost by state
PMax cross-serving ~$1,170 Negatives do not fully bind PMax; it matches on AI + feed Feed hygiene + search themes + brand exclusions PMax search-term insights: zero-conversion categories
Branded cannibalization CPC $2-4 β†’ $0.30 PMax absorbs brand searches at a premium Dedicated branded Search campaign + brand exclusions Compare branded vs non-branded CPC
Ad-schedule hours ~$789 Ads run 24/7 with zero time-of-day bid adjustments Negative bid adjustments on weak hours Day & hour report: ROAS by hour

Leak 1: I was paying to advertise in states that don’t buy

The audit pulled conversions by state and the picture was blunt. About $924/month was going to states with high clicks and poor-to-zero return. One state had spent real money for zero conversion value over the window. Several more sat well under a 1.0x ROAS, meaning I paid more to reach them than they ever returned.

Widen the lens across the account’s shopping campaigns and the directional geo waste was closer to $1,800/month. That is not “cut everything” money, some of those regions are worth a reduced bid rather than a full exclusion, but it is money that was flowing out on autopilot because nobody had ever looked at the map.

How to check this yourself: in Google Ads, open a campaign, go to the locations report, and add the conversions and conv. value / cost columns. Sort by cost. Any state spending real money at well below your target ROAS is a candidate for a bid-down or an exclusion. You are looking for the states that take clicks and give nothing back.

Leak 2: Performance Max was buying clicks for things I don’t sell

This is the one that surprised me, because I thought I had already handled it.

Performance Max on that account had 111 negative keywords applied. It still spent about $1,170/month on 2,164 clicks that converted zero times, spread across 102 auto-generated search categories, at an average cost of about $0.52 a click. I was paying for a category called “clothes” (I don’t sell clothes), for a competitor’s brand name, and for generic terms with no buying intent.

Here is the part most guides get wrong: negative keywords behave differently on Performance Max than on Search. Per Google’s own docs, PMax negatives only govern its Search and Shopping inventory (Google Ads Help); they do nothing for the Display, YouTube, Gmail, or Discover placements PMax also buys (account-level negatives). And PMax finds buyers using AI, feed data, and audience signals rather than an exact-keyword auction (about PMax), so a negated term still lets semantically related queries through its auto-generated categories. Google raised the campaign-level negative cap to 10,000 in 2025, but even that only touches Search and Shopping. This is structural, not a missing setting, and adding more negatives barely moved it.

What actually helps is upstream: clean the product feed so ineligible products (equipment, competitor lines, anything that should not be advertised) are excluded, and give the campaign real search themes so you steer intent instead of hoping negatives catch the overflow. The campaign leaking the worst had zero search themes set.

Leak 3: Performance Max was eating my branded searches

My branded terms convert very well, of course they do, the person is already typing my store name. The trap is what you pay for them.

In a dedicated branded Search campaign, my brand-name clicks cost about $0.30 each. On non-branded terms I pay $2 to $4 a click. When Performance Max is allowed to absorb branded searches, you still get the sale, and the ROAS on that campaign looks great, but you are quietly paying a premium to buy back a customer who was already coming to you.

What I pay per click: my brand name vs non-branded Bar chart comparing average cost per click. Non-branded terms cost $2 to $4 per click. My own brand name costs about $0.30 per click in a dedicated branded Search campaign, roughly ten times cheaper. Source: my own account. What I pay per click Non-branded vs my own brand name (dedicated branded campaign). Source: my own account. Non-branded $2-4 / click My brand name $0.30 / click

I want to be honest about the ROAS number here, because this is where people fool themselves. My branded campaign shows a very high return on paper. I do not credit that as pure merit. A lot of it is promo-period timing and demand spilling over from my other campaigns. The real reason to run a lean, dedicated branded campaign is not the headline ROAS, it is the $0.30 CPC and brand protection, so a competitor (or your own PMax) is not setting the price on your own name.

The fix: run a tight branded Search campaign with exact and phrase brand terms, keep it cheap, and apply brand exclusions on Performance Max so it stops serving for your name (a control Google expanded in 2025). PPC practitioners flag this brand-cannibalization pattern widely; the fix is the same. You defend the brand at $0.30 instead of renting it back at a premium.

Leak 4: The ads ran all day, including the hours that only bring browsers

The account had an ad schedule, but every single entry had a bid adjustment of zero. In other words, there was a schedule but no dayparting, all 21 schedule entries were flat, and one campaign had no schedule criteria at all.

When I looked at performance by hour, the waste was obvious. On one campaign, four hours were dragging: 11:00 spent $366 at 0.6x ROAS, 22:00 spent $130 at 0.4x, plus a couple more, roughly $789/month of clicks that mostly window-shopped. (I trust the hourly read here because 91% of this account’s conversions land within a day, so the 30-day numbers are stable enough to act on.)

How to check: in Google Ads, use the “Day & hour” or time report, add conversions and ROAS, and find the hours where you spend real money at a fraction of your target return. Those get a negative bid adjustment, not necessarily off, just dialed down.

What the Google Ads audit added up to (honestly)

I don’t want to inflate this. The leaks overlap, so you cannot just sum them. The audit’s concrete, non-overlapping recoverable figure was ~$1,282/month on that one account, cuts plus reallocation. If you counted every directional geo and daypart opportunity on top, the ceiling was about 31% of the account’s spend, but those are single-dimension estimates that double-count, so I treat the ~$1,282 as the number I can actually bank and the 31% as “how much slack is in here if I keep pulling.”

The account was not broken. It scored 83/100 in my own audit and ran at a healthy 3.85x blended ROAS. That is the point: a good account can still leak four figures a month, and the platform’s optimization score will happily call it excellent while it does.

How I run this now

The audit is a Claude skill I built and open-sourced, wired to the account through the Google Ads API. I wrote up how the skill itself works in a separate post: an open-source Claude skill for ecommerce Google Ads. The short version is that every morning it re-checks geography, search-term categories, branded pacing, and hour-of-day, and only pings me when something crosses a threshold. The manual hour-per-account became a 10-minute read. I connect Claude to my stores through MCP the same way I run store ops, which I walk through in connecting Claude to Shopify via MCP.

What this audit can’t do (honest limits)

  • It surfaces signals; it does not make the calls. It tells me a state is bleeding money; I decide exclude versus bid-down based on whether I want presence there.
  • It is directional, not a lab experiment. These are my accounts over 30 days. Your mix of campaigns, margins, and seasonality will differ.
  • It does not replace strategy. Cutting waste is defense. Growth still needs a plan; on the SEO side of that plan I wrote about making Shopify collection pages AI-citable.
  • Numbers like a 15x branded ROAS are not proof of a genius campaign, they are often spillover. Read them with suspicion.

FAQ

How do I audit my own Google Ads account?
Start with four reports you already have: locations (conversions by state), search terms / PMax insights (zero-conversion categories), your branded vs non-branded CPC, and performance by hour. Sort each by cost and look for spend that returns well below your target ROAS. That is 80% of the value before any tool.

Is Performance Max cannibalizing my branded search?
Often, yes. Check your branded CPC inside a dedicated branded campaign versus what PMax pays for the same intent. If PMax is winning your brand name at a higher cost, apply brand exclusions to PMax and run a lean branded Search campaign.

Why do negative keywords not stop Performance Max waste?
Because PMax negatives only cover its Search and Shopping inventory, not Display, YouTube, Gmail, or Discover (Google Ads Help), and PMax matches on AI, feed, and audience signals rather than an exact-keyword auction (about PMax). So auto-generated categories slip past keyword negatives. The stronger levers are feed hygiene and search themes.

Do I need an agency to audit Google Ads?
No. An operator who knows the business can often spot waste faster than a templated agency audit, because you know which states, products, and terms actually matter. A tool just makes the first pass quick.

If you run an ecommerce store

If you read this and want a second pair of eyes on your account, email me at [email protected] with your store and what you are trying to fix. I audit a few accounts for free depending on what you are after. I would rather you catch your own $1,000/month leak than keep paying it.


About the author: Khue Tran runs several US ecommerce stores and builds open-source Claude tools for store and ad ops. 15 years in performance marketing, half of it hands-on in Google Ads.

claude-google-ads: an open-source Claude skills plugin for ecommerce Google Ads

claude-google-ads dark cover: leak to fix motif with an 83 out of 100 audit score gauge
Hand-drawn illustration of a leaking Google Ads budget bucket on the left, an arrow through a Claude Code plugin gear in the middle, and a sealed bucket with a money-leak report and safety lock on the right.

The 90-second version

  • I built an open-source Claude Code plugin called claude-google-ads. It is 15 skills that operate Google Ads end-to-end for ecommerce stores: connect, audit, plan, build, push, and optimize, all on your real account data.
  • It is built on four rules: never fabricate a number, pull everything from the API instead of saying “check the UI,” never touch the account without approval, and ground every recommendation in your account rather than a generic playbook.
  • The core of it is a money-leak engine that ranks where your budget is bleeding by dollars per month, not a vague “score 85.”
  • I run it on a US nail-supply distribution business I operate. On one audit it scored 83/100, surfaced about $1,282/month of recoverable spend, and caught nine out-of-stock products burning roughly $392/month that the feed was still advertising.
  • It is MIT-licensed and on GitHub: chanktb/claude-google-ads. If you run an ecommerce account and want a second set of eyes that never invents data, this is the one I would install.

The problem: most Google Ads audits tell you nothing you can act on

If you run Google Ads for an ecommerce store, you have probably paid for an audit that came back with a number like “your account scores 85” and a list of generic best practices. That number does not tell you where a single dollar is leaking. Worse, a lot of automated tooling does one of four things that quietly erode trust:

  • It punts. When a setting is awkward to read through the API, the tool writes “verify this in the UI” and moves on. You hired it to read the account, and it handed the work back to you.
  • It guesses. When data is missing, it fills the gap with a plausible-looking number. A confident wrong number is worse than a blank, because you act on it.
  • It does not understand a reseller. If you distribute brands like OPI, DND, or Kupa, a generic tool flags a search for a brand you sell as a “competitor to block.” Blocking it kills your own sales.
  • It changes things unsafely. It pushes budget and bid changes with no cooldown and no approval, and resets the Smart Bidding learning you already paid to build.

I built claude-google-ads because I was tired of all four. Every rule in the plugin exists to make one of those failures impossible.

What is claude-google-ads?

It is a Claude Code plugin: a set of 15 skills you invoke from any Claude session, that read your live Google Ads account through a read-only API connection and produce audits, plans, campaign blueprints, and safe change sets. It is scoped to ecommerce on purpose: retail, wholesale, and direct-to-consumer stores with a product catalog, store revenue, AOV, and ROAS targets. It is not built for lead-gen, SaaS, or local-service accounts, because those have a different measurement model and pretending otherwise would produce bad advice.

If you have never used a Claude skill, the short version is in my collection SEO skill write-up, and the connector layer it depends on is in my MCP setup guide, and the broader toolkit it builds on in my Claude Growth Kit review. A plugin is just a bundle of skills with shared references and scripts.

The four rules that make it different

  1. No-fabricate gate. If a number is not in your connected data, the plugin flags it UNVERIFIED and omits it. It never invents a figure to fill a gap. This is the same discipline I want from a junior analyst: say “I do not know” instead of making something up.
  2. Pull everything. “Verify in the UI” is treated as the cardinal sin. The working assumption is that if a fetch comes back empty, the method was wrong, not that the API cannot read it. That assumption has paid off repeatedly, which I will show below.
  3. Safety by construction. Anything that writes to the account is gated: campaigns are created paused, behind a human approval step, with a spend cap and a bidding cooldown so you cannot accidentally whipsaw the algorithm.
  4. Grounded in your account. Every business fact lives in one file, account-context.yaml: your brand terms, the brands you carry, your margins, your guardrails. The skills stay generic; the context file makes them yours.

What does claude-google-ads actually find?

The heart of the plugin is a diagnostic engine that runs fourteen checks, labeled D1 through D14, and ranks every leak it finds by estimated dollars per month. Instead of a score, you get a list you can work top to bottom:

  • bid and target health (is the campaign budget-capped, target set too high, or starved of data)
  • geo and dayparting waste (regions and hours spending with no return)
  • zero-conversion products draining the Shopping or Performance Max feed
  • Performance Max channel and placement burn
  • weak or thin assets and extensions
  • account structure problems and Quality Score drags
  • product-feed health: out-of-stock items you are still paying to advertise

Each finding comes with the evidence (real numbers from your account), a root-cause read rather than a symptom, the dollars per month at risk, and the specific fix. The output is a single self-contained HTML report you can open in a browser or send to a stakeholder.

What does the report look like?

Two parts of the report do most of the work: the account overview, which lists every account-level setting with a verdict, and the per-campaign deep-dive, which turns each campaign’s metrics into charts. Below is a trimmed, anonymized slice from a real audit so you can see the shape. The numbers are real; the brand and campaign names are masked.

83/ 100

Store account: Google Ads AuditB

Last 30 days · per-campaign visual explainer
$13,937
Spend (30d)
3.85x
Blended ROAS
$1,282
Recoverable / mo
4
Active campaigns
GOODWATCHFIXVERIFY (UI)
Solid ecom Search and PMax setup (account ROAS 3.85x, 91% conversions <1d, 32 shared negative lists with 607 members, brand-exclusion architecture clean). Top fixes: (1) the catch-all ~$1,170/mo PMax category leak, structural to PMax search-term-insight matching, NOT a missing-negative problem (111 negatives already in place); (2) ad-schedule bid_modifier=0 across all camps, no dayparting strategy; (3) two PMax workhorse asset groups still PENDING ad-strength.
📊 $1,282/mo concrete recoverable (cuts + reallocation, non-overlapping). Plus 6 directional geo/daypart opportunities flagged per campaign, single-dimension estimates that overlap, so NOT summed.
⏱ Conversion lag: 91% same-day, 100% within 7d, short-window ROAS is TRUSTWORTHY.

Account overview

Store account

4 active campaigns · $13,937/30d · 3.85x blended
4 good8 watch2 fix5 verify
Location targeting = PRESENCE on all active campaigns people physically in the geo, not merely interested
GOOD
Conversion lag 91% same-day, 100% within 7d, so short-window ROAS is trustworthy
GOOD
Account negative & brand-exclusion lists brand-list exclusions (x5) + 2 shared lists applied across PMax
GOOD
Catch-all PMax category leak ~$1,170/mo despite 111 negative keywords (structural to PMax, not a config gap)
→ Audit the Shopping feed and restrict Search themes; keyword negatives only partially block PMax categories.
WATCH
Budget misallocation across PMax shift ~$797/mo from the catch-all (2.87x) to the top brand PMax (3.99x)
→ Est +$628/mo. Move in +10-15% steps on Mondays, after the cooldown clears.
FIX
Final URL Expansion + auto-created assets not in the Ads API on this version
→ Confirm per-PMax in the UI.
VERIFY

Per-campaign deep-dive

Catch-all PERFORMANCE_MAX

$5,317 → $15,235 value · 224 conv · ENABLED · budget $180/day
8 good6 watch4 fix4 verify
Performance and delivery: every metric as a chart
ROAS vs target GOOD
2.87x▲ target 2.5x · 115%
Beating target.
Budget pacing WATCH
98%of budget/day
→ Budget-capped & on-target β†’ scale +10-15% after cooldown.
Channel mix GOOD
99%Search
other 1.0% : YouTube $38 Β· Gmail $11 Β· Maps $3 Β· Display $2 Β· Discover $1
Device : spend & ROAS GOOD
Mobile$4,380 Β· 2.88xDesktop$872 Β· 2.25xTablet$55 Β· 10.97xOther$10 Β· 5.21x
Geo : winners (keep / scale): high value & ROAS GOOD
North Carolina$1,345 val Β· 8.5xTexas$1,266 val Β· 3.0xCalifornia$1,119 val Β· 3.1xIllinois$1,028 val Β· 6.3xNew York$880 val Β· 3.2xConnecticut$582 val Β· 10.4x
→ These states convert efficiently : protect budget / geo bid-up (Search & PMax both support location bid adjustments).
Geo : drains (exclude / bid-down): zero-value + low-ROAS spend FIX
Pennsylvania$172 cost Β· 0.7xNevada$96 cost Β· 0 value (100% waste)Massachusetts$117 cost Β· 0.7xVirginia$124 cost Β· 1.0xAlabama$105 cost Β· 0.7xNew Jersey$124 cost Β· 1.1xPuerto Rico$126 cost Β· 1.4xNew Mexico$61 cost Β· 0.2x
→ $924/mo in drains (1 states at 0 conversion value = pure waste) : exclude or apply a location bid adjustment (supported on PMax too, not exclusion-only).
Schedule : ROAS by hour WATCH
0h6h12h18h23h
→ WHERE: 11:00 [email protected], 16:00 [email protected], 07:00 [email protected], 22:00 [email protected]. Apply an ad-schedule bid adjustment (supported on PMax too) or tighten the schedule window.
Negatives & products
Negatives & brand blocks merged from 4 sources: brand-list (x2) + 3 shared lists (112 terms)
GOOD
0-conv product burners 8 products, $416/mo, 0 conv
→ Check stock: out-of-stock means restock or exclude; in-stock means a price or intent issue.
WATCH

Every row follows the same pattern: the data, a verdict (GOOD, WATCH, FIX, or VERIFY), and the specific action. Every campaign metric is a chart, not a number buried in a table, so you can see at a glance whether ROAS beats target, whether the budget is capped, where the spend goes by channel and device, and which regions to scale or cut.

How do you install and run it?

Installation is one command in Claude Code:

/plugin install claude-google-ads@chanktb/claude-google-ads

There are three ways to use it, and you do not have to memorize anything:

  1. Type /claude-google-ads and a menu lists every skill. Arrow down and pick.
  2. Describe what you want in plain language: “audit my Google Ads,” “set up Google Ads for my store.” The matching skill runs.
  3. Type the exact command if you know it: /claude-google-ads:audit.

The standard flow for a new account is: setup to connect your data, measurement to validate conversion tracking before you spend, audit to find the leaks, plan to design the campaign mix, the builder skills to draft campaigns, push to export them safely, then track and optimize on an ongoing basis.

The 15 skills, grouped

The plugin organizes its skills into four stages. Here is what each one solves and how you use it.

Start here

google-ads (router). The entry point. It reads your context, tells you where you are in the lifecycle, and points you at the single next skill to run. Use it when you are not sure where to start.

setup. The connection hub. It inventories your data sources (Google Ads, your store, Merchant Center, GA4, Search Console), records them in account-context.yaml, and captures your brand terms, the brands you carry, margins, and guardrails. This file is the single source of business truth that every other skill reads. Run it first.

Diagnose and fix

measurement. The conversion-tracking gate. It checks your primary and secondary conversions, looks for double-counting, and cross-checks Ads against GA4 and your store. Broken tracking misleads Smart Bidding into optimizing for the wrong outcome, so this skill blocks planning until tracking is sound.

audit. The money-leak engine described above. It builds the active-campaign set, pulls the data, applies its guardrails, scores the account, and writes the HTML report with per-campaign visuals.

optimizer. It acts on the findings: search-term mining into negatives, geo and product exclusions, budget reallocation, target-ROAS steps, and pausing dead weight. The output is a typed change set that respects bidding cooldowns and never blocks your brand or a brand you sell.

Plan and build

plan. Budget split, campaign mix, learning-phase math, and a forecast built from your real CPC, conversion rate, and AOV. It sequences what to launch and why.

builder-pmax. A complete Performance Max blueprint: split strategy, asset groups, listing groups, copy and search themes grounded in converting data, audience signals, and real price assets.

builder-search. A non-brand Search campaign that harvests the proven converters Performance Max already discovered into exact-match control, rather than betting on keywords from scratch.

builder-branded-search. Brand defense plus optional, trademark-safe competitor conquesting, kept as separate campaigns, with the brand-exclusion coordination that stops your brand campaign and Performance Max from fighting over the same query.

builder-demand-gen. Top-funnel prospecting and retargeting across YouTube, Discover, and Gmail, with audience-led creative.

assets. The shared creative generator: responsive search ads, Performance Max copy, and image and video briefs, with character limits, brand voice, and trademark safety enforced.

Push and operate

pusher. It exports the build as a Google Ads Editor CSV or turns a change set into a guided checklist. Everything is created paused, behind an approval gate, with a spend cap. With a read-only connection it exports files for you to import, so it never touches the account silently.

tracker. Observes pacing, the learning phase, and anomalies. It changes nothing. Use it between optimization passes to catch drift early.

experiments. Designs disciplined A/B tests with a feasibility gate that refuses tests too small to reach significance, so you do not burn weeks on a test that can never conclude.

routine. The daily, weekly, and monthly operating rhythm. It calls tracker and optimizer at the right cadence and tells you what is due or overdue.

Why I trust it: the gates came from real failures

Like the other skills I have written about, every guardrail in this plugin exists because something broke and the fix had to be encoded. A few that earned their place while I was running it on a live account:

  • An inverted enum that produced a false finding. The audit once flagged every campaign as using “Presence or Interest” location targeting, a known waste pattern, and told me to switch to Presence-only. The account was already on Presence-only. The bug was a reversed enum mapping. I confirmed the correct values against Google’s official API definition (the value 7 means Presence, which is correct, not the leak), and fixed the mapping. The lesson became a rule: verify enum values against the source, never from memory.
  • A reseller rule that protects your own sales. The optimizer recommended blocking search terms for Kupa, Chaun Legend, and Kiara Sky as “competitors.” I sell all three. A search for a brand you stock is buying intent, not a competitor. The plugin now classifies brand terms three ways: your own brand (never block), a brand you carry (block only to route to its dedicated campaign, otherwise protect it), and a true competitor (a candidate you confirm before blocking). A brand sitting in a catch-all campaign is there because it has not been split out yet, not because it is a rival.
  • Negatives that live in four places. An early run reported “weak negative coverage” on a campaign that actually had over 100 negatives. The reason: negatives live in four separate places (campaign-level, shared lists, account-level, and brand-list exclusions), and the first pull only read one. The plugin now merges all four before it dares to judge coverage.
  • Pull everything, including the things people assume you cannot. Acting on the “wrong method, not a limit” assumption, the plugin now reads content-label exclusions, full geo names, impression share, and even the list of competitor domains from the Auction Insights report, all through the API. Some of those are gated behind account permissions rather than missing, which is a different problem with a different answer than “check the UI.”

A real account: what it caught

I run a US nail-supply distribution business, four active campaigns, around $580 per day in spend across them, with a healthy blended return. I am not naming the brand or publishing absolute revenue, for the same reason I redact it in my other write-ups: handing competitors a read on which lines perform would be operator malpractice. The patterns are what matter, and they are real.

On one audit pass the account scored 83 out of 100. The plugin surfaced roughly $1,282 per month of concrete recoverable spend (cuts plus reallocation). The concrete findings:

  • Nine out-of-stock products burning about $392/month. The product-feed check cross-referenced the spending items against live store inventory and found nine SKUs, mostly higher-priced equipment, that the feed was still advertising while the store could not fulfill them. One had even oversold. That is pure waste, fixable from the store side in minutes.
  • One state quietly draining spend. A single region was spending about $107/month at a 0.65x return, well below the account’s bar. Small on its own, but exactly the kind of thing a “score 85” never shows you.
  • Flat dayparting. Every ad-schedule entry had a bid modifier of zero, meaning no time-of-day strategy at all, despite clear swings in hourly return.
  • A catch-all campaign losing the auction. Impression share on the catch-all Performance Max campaign was under 20%, with most of the lost share going to competitors on ad rank rather than to budget. That is a strategic signal, not a quick fix, and the plugin labeled it as such.

Here is the honest part. The very first version of that report had the inverted-enum bug and the reseller false-positive in it. I caught them because the findings did not match what I knew about my own account, fixed the skill, and re-ran. The corrected report was right the first time on the next pass. That loop, a wrong output forcing a permanent fix, is exactly how the plugin got trustworthy. Production failures are the spec.

What does it not do?

  • It does not pull Auction Insights competitor metrics on every account. Those metrics exist in the API but are restricted, so unless your developer token is allowlisted by Google you get a permission error. The plugin degrades to the impression-share signal plus the competitors you listed at setup, and it tells you which happened.
  • It does not mutate your account directly yet. Version one exports a paused Editor CSV behind an approval gate. Direct API writes are deliberately deferred until the safety story is airtight.
  • It is ecommerce only. No lead-gen, SaaS, or local-service paths. If your account is not a product catalog with revenue and ROAS, this is the wrong tool.

FAQ

Is it really open source?

Yes. It is MIT-licensed and public on GitHub at chanktb/claude-google-ads. You can read every skill, every script, and every guardrail before you run it.

Will it change my account without asking?

No. With a read-only connection it can only read and export files. Anything that could write is gated behind a human approval step, creates campaigns paused, and respects a spend cap and a bidding cooldown. The safety model is the whole point.

Do I need every connector to use it?

No. Google Ads is the only mandatory connection. Your store, Merchant Center, and GA4 add the full depth (real AOV, true ROAS, feed health, and the value cross-check), but the core audit and money-leak diagnostics run on the Google Ads connection alone. Whatever you have not connected is flagged UNVERIFIED rather than guessed.

What does it cost to run?

The plugin is free. The only cost is the Claude API spend for a session, which for an audit is in the low single dollars. The real investment is the operator time to review and approve changes, which is the right place to spend it.

Why ecommerce only, and not lead-gen?

Because the measurement model is different. Ecommerce optimizes on order value and ROAS against a product catalog. Lead-gen optimizes on lead quality and CRM outcomes. Building one tool that pretends both are the same produces advice that is wrong for both. The plugin declares its scope up front and stays inside it.

Can I trust the numbers in its reports?

That was the design goal. Every figure is either grounded in your connected account data or flagged UNVERIFIED and left out. When a fetch comes back empty, the plugin assumes it used the wrong method and retries, rather than telling you to check the UI. If you find a number you cannot trace, that is a bug, and I want the issue.

Install it, or tell me what breaks

If you run an ecommerce Google Ads account and you are tired of audits that say “score 85” and “check the UI,” install it: /plugin install claude-google-ads@chanktb/claude-google-ads. It is free and MIT-licensed.

If you run it and something looks wrong, that is the most useful thing you can send me. Open an issue on GitHub or email [email protected] with the subject “google-ads plugin.” Every real failure becomes a permanent fix, the same way the ones above did.

How I Built a Claude Skill to Optimize Shopify Collection Pages for SEO + GEO (12 Hubs Tested, 200 More to Go)

Hand-drawn illustration of a thin Shopify collection page on the left, an arrow through a Claude skill workflow gear in the middle, and an optimized deep collection page with FAQ and schema on the right.

The 90-second version

  • I built a Claude skill called collection-mega-hub-optimize. It is a 12-step workflow with 15 hard gates that takes a thin Shopify collection page from a composite SEO + GEO score in the 48-65 range up to 85+/100.
  • I shipped it iteratively while optimizing 12 real collection pages on one of my brands. Every hard gate exists because a real failure forced me to add it. The skill is the institutional memory.
  • I test it with three loops: a Search Console pull (90-day baseline vs 90-day post-publish), a composite score audit before and after, and a SERP rank track on the top 5 queries per hub. Across the 12 hubs the lift is consistently +30-40% on impressions and +30-35 composite points.
  • The skill is now stable enough to roll out to the remaining 200+ collection pages on the same store. Next 90 days target: 50 hubs through the same skill, gates preventing regression.
  • If you run a Shopify store with 50-500 collection pages and most of your category pages are just a product grid with a generic title, this is the playbook I would copy onto your store before writing a single new blog post.

Why I built this skill instead of just running prompts

Most Shopify stores past their first year have a hidden problem in their collection pages. The product detail pages (PDPs) get attention. The blog gets attention. The collection pages, the ones that sit between the home page and the products, often look like this:

  • An H1 that says BRAND - All products or just the brand name in all caps
  • No body content, just the product grid
  • A meta description that Shopify auto-generated from the first product title
  • No FAQ, no schema beyond the default Shopify ItemList
  • Zero internal links from this page out to anything else

I have one brand with over 200 collection pages built up over eight years. I sampled six of them with an audit script and the mean composite score was 48-65 out of 100. That is “the page exists but Google has no reason to rank it and an AI assistant has no clean passage to cite.”

The naive fix is to write better content for each page by hand. At roughly 2 to 3 hours per hub including audit, copy, schema, internal linking, and testing, that is 400 to 600 hours of work for one brand. Unscalable.

The alternative is a skill. A Claude skill is a self-contained markdown file with a prompt, a workflow, and hard gates that block the workflow from continuing if any quality check fails. You invoke it with a single command and the same procedure runs the same way on every hub. The gates are the part that matter most because they encode every lesson you have already paid for.

What a Claude skill is, in 60 seconds

If you have used Claude Code, you have probably been invoking skills without thinking about them. A skill is a folder under ~/.claude/skills/[skill-name]/ with a SKILL.md file at the top. The frontmatter declares the skill name, a description, and a trigger phrase. The body is the workflow Claude follows when the skill is invoked. (If you have not connected Claude to Shopify yet, my three-path MCP setup guide walks through the connector layer this skill depends on.)

Reference: Anthropic Claude Code Skills documentation.

Here is the minimum mental model:

  • Skill folder: the unit. One folder, one skill, one purpose.
  • SKILL.md: the prompt + workflow + hard gates. Versioned. Editable.
  • references/: supporting markdown the skill loads on demand (templates, schemas, examples).
  • scripts/: helper Python or bash the skill calls (verify scripts, push scripts).
  • Invocation: slash command or natural-language trigger in any Claude session.

Why this beats keeping the same instructions in a long prompt or a Notion doc:

  1. Gates are enforceable. You can write “do not use the word delve” in a prompt and Claude will sometimes still write delve. You can write the same rule in a skill as a hard gate that checks the output and refuses to proceed. The skill blocks itself before the bad output reaches you.
  2. The skill is versioned. When you catch a new failure mode, you add a gate, bump the version, and every future invocation has the lesson baked in.
  3. The skill is portable. Drop the folder onto any operator’s machine and they have the same workflow.

The collection skill I built is exactly this shape. One folder, one SKILL.md, a few reference templates, and a notify script. Total roughly 600 lines of markdown.

The 12 steps inside the skill

The full skill runs 12 steps end-to-end. I will summarize each in one sentence and call out what is unusual.

Step 0.5: Knowledge base factcheck (HARD GATE 0)

Before any writing happens, the skill greps a local product knowledge base for the product line being optimized. The KB is the highest-authority source because it has the first-party facts: best-seller status, target customer, upsell pairings, discount margin. The skill refuses to write content if it has not loaded KB facts into working memory first. This gate exists because the first time I skipped it I shipped seven hallucinated facts about a top-selling product line. The KB had every correct fact the whole time.

Step 1: Baseline pull, three sources in parallel

Pull from the Shopify Admin GraphQL (collection metadata, metafields, current schema), the live page (DOM, current title length, current schemas), and Search Console (90-day impressions, clicks, top queries). All three feed a baseline snapshot JSON the skill diffs against later.

Step 2: Tier detection and brand mapping

Classify the collection: mega-hub, brand-hub, sub-collection, or tool-tier. Pull every related sub-collection from the Shopify catalog so the skill knows which handles exist. Hard gate: the skill is never allowed to write an internal link to a handle that was not in this pull. This gate exists because in an earlier round I hallucinated handles that looked plausible but returned 404. Reader trust evaporates fast on broken internal links.

Step 3: SEO title rewrite with brand-suffix opt-out

Most Shopify themes append " - {Store Name}" to every page title. On a brand-hub that looks like "OPI GelColor - Store Name" which wastes 12-15 characters on duplicate branding. The skill sets a boolean metafield custom.suppress_brand_suffix = true and rewrites the SEO title to 55-60 characters of full keyword and unique selling point. The theme reads the metafield and skips the suffix.

Step 4: Meta description, 120-160 characters, no AI-trigger phrases

The skill maintains a banlist of phrases that scream AI-written: delve into, navigate the landscape, in today’s fast-paced, in conclusion, flawless, explore. The gate scans the output and refuses to proceed if any banned phrase appears. Replacement vocabulary is action verbs the catalog actually uses: shop, browse, get, stock, compare.

Step 5: H1 fix if generic

If the collection title is “BRAND” or “Brand – All products,” rewrite it. Renaming the title cascades to the H1, the breadcrumb, and the internal anchor text from PDPs. Verify the navigation menu uses a separate linklist label or this step risks renaming the nav too.

Step 6: Deep content, tier-aware section template (1,500-2,500 words)

This is the largest step. Different category tiers use different section templates. The skill ships six templates because gel collections, tool collections, bundles, seasonal duos, bulk-save tiers, and nail art each have different reader intent and different competitive sets.

Tier Sections Word count Required visual assets
gel / dip / polish 8 1,500-2,000 Hero only
tools / lamps / drills 10 1,800-2,500 Hero + SVG spec chart + product callouts
bundles / sets 7 1,200-1,700 Hero + bundle composition diagram
bulk-save 6 1,000-1,500 Hero + pricing tier table
seasonal (spring/summer/fall/winter) 7 1,200-1,700 Hero + seasonal color story
nail art (cat eye, chrome, pat pat) 9 1,500-2,000 Hero + technique callouts
The six tier templates inside the skill. The tools template carries the most surface area because hardware buyers compare specs.

A gel/polish collection uses the 8-section template: overview, brand spotlight, how to pick, comparison table, application guide, care, wholesale, related. A tools collection adds extra sections for specs comparison, bit compatibility, safety workflow, and maintenance. A bundle collection focuses on bundle composition value math.

The content is written in the store’s own voice as if the merchandising team wrote it. Hard gate 12 forbids any phrase that exposes the internal workflow: no “the KB notes,” no “per our internal data,” no “according to our knowledge base.” Salon technicians do not know what a KB is. The voice has to read like a human merchandiser wrote it from memory.

Step 7: Internal linking, three layers, 12-20 links per hub

Layer A wraps the brand H3 headings in <a href> tags pointing to brand sub-collections. Layer B wraps the first cell of every comparison table row in the same link. Layer C is a new H2 called “Related collections” with 5 cross-hub teasers placed before the “Related reads” block. Total 12-20 internal links per page, every single one verified against the Step 2 inventory.

Step 8: FAQ as a flat metafield (not a schema.org wrapper)

The store theme reads the FAQ metafield as a flat array of {q, a} objects. The theme builds the FAQPage JSON-LD wrapper itself from the flat data. If you put the schema.org wrapper directly in the metafield, the theme renders three empty FAQ accordion boxes with no question text inside. I shipped this bug once on a major brand-hub before I added gate 15 (FAQ live render verify) which catches it in 3 seconds via a curl + grep.

Step 9: Push metafields in a single batched mutation

One metafieldsSet mutation pushes the deep content HTML, the FAQ flat array, the brand-suffix boolean, and any sub-category list together. Batching matters because Shopify rate-limits per-call and a 4-field push as one call is 4x cheaper than four sequential pushes.

Step 10: Apply the hybrid section template

Push a templates/collection.{handle}.json with the proven section order: main banner, sub-nav, product grid, FAQ accordion, deep content. Order matters for both readability and crawl: the FAQ sits right under the product grid which is where users scroll first, content sits at the bottom for users who need depth.

Step 11: Pre-publish verification (5 checks)

Five gates run before the skill marks itself successful: em-dash count zero, AI-trigger phrase count zero, HTML title under 60 characters on the live page, all internal /collections/ links return 200, all internal /blogs/articles/ links return 200. The link sweep is delegated to a cheap Haiku sub-agent because verifying 20 URLs does not need a frontier model and saves the main session’s context budget.

Step 12: Live composite re-score and Telegram notify

Run the audit skill against the live URL and confirm composite score crossed 85. Send a Telegram message to my production channel with the hub handle, tier, before/after composite, and a one-line summary. The notify is mandatory because production events need visibility alongside blog publishes. A skill that ships changes silently is a skill that lets regressions accumulate unnoticed.

The 15 hard gates, each from a real failure

The gates are the institutional memory. Every gate exists because I shipped a bug, you caught it (or my own audit caught it), and the only way to prevent it from happening again is to encode the check into the skill itself.

Here are the five gates that matter most and the failure each one prevents:

  • Gate 0, KB factcheck first. Failure: I shipped seven false facts on a top-selling product line because I pulled Shopify titles and guessed the rest. The KB had every correct fact. Gate forces a grep on the KB before any writing starts.
  • Gate 4, Zero em-dashes in deep content. Failure: em-dash density above 0.3 per 100 words flags as AI-written in most modern AI detectors. Gate runs reduce_emdash.py before push and refuses to proceed if any em-dash survives.
  • Gate 12, No internal source labels. Failure: content that says “the KB notes” or “per our database” reads like a customer service script. Gate scans output for KB / database / our records phrasing and rewrites to direct facts.
  • Gate 14, Telegram notify mandatory. Failure: I optimized hubs silently for two weeks and lost track of which were live, which were rolled back, which had hero images pending. Gate sends a structured notification per publish so the production channel is always the source of truth.
  • Gate 15, FAQ live render verify. Failure: schema.org FAQPage wrapper in the metafield instead of flat {q, a} = three empty FAQ boxes on the live page. Gate curls the live URL and greps for actual question text. Blocks Telegram notify if FAQ DOM is empty.

The other 10 gates cover URL inventory verification, title length, schema bundle completeness, tier-aware content depth, hero image policy, and similar boring-but-load-bearing checks. Every gate adds maybe 30 seconds to skill runtime. The cost is trivial. The protection is enormous.

How I test the skill actually works

Three test loops run on every hub the skill touches, with results pulled at 30, 60, and 90 days post-publish.

Loop 1: Search Console diff

Pull 90 days of impressions, clicks, average position, and top queries from Google Search Console for the hub URL before optimization. Wait 30 days, pull the same 90-day window post-publish. Compute deltas. The hubs I have tested show consistent gains in impressions and average position, with click-through following at a slight lag because new content needs time to win SERP attention.

Loop 2: Composite score audit

Run the collection-analyze skill against the live URL before and after. This is the 100-point scorecard the skill targets. Pre-optimization composite is in the 48-65 range across the hubs I sampled. Post-optimization composite is consistently 85+ which is the hard gate threshold the skill enforces.

Loop 3: SERP rank track on top 5 queries

Pull top 5 queries the hub already ranks for from Search Console, then track SERP position for those queries weekly via a DataForSEO live SERP pull. This catches the case where impressions go up because of new long-tail surface area but the head terms regress. I have not seen a regression on the 12 hubs so far.

What the test loop does not measure

Conversion rate is not in the test loop because attribution from collection page traffic to revenue is messy on wholesale stores. I track aggregate revenue trend at the brand level but I do not claim individual hub optimization caused individual revenue lift. The skill optimizes for SEO and GEO. Revenue lift is the downstream consequence I cannot cleanly isolate.

Results across the 12 hubs I have shipped

Composite SEO + GEO score before vs after, 5 sample hubs Before After 85 gate 100 75 50 25 0 52 88 Hub A 48 86 Hub B 61 91 Hub C 55 87 Hub D 64 92 Hub E
Composite score lift across 5 anonymized hubs (sample from the 12 shipped). Green dashed line is the 85-point hard gate the skill enforces. Every hub crossed the gate; mean lift across the 12 hubs is +30-35 points.

Two batches so far:

  • Batch 1 (7 mega-hubs): the largest, highest-traffic brand-hubs on the store. Mean composite before: 48-65. Mean composite after: 85+. Impression lift trending +30-40% in the 30-90 day window. Time to ship per hub: 2-3 hours of active operator time per hub, most of that reviewing AI output and approving live publishes.
  • Batch 2 (5 brand-hubs selected from GSC opportunity data): hubs with high impressions but low CTR and average position above 10. Same skill, same gates, same composite lift pattern. Brand-hubs are lighter than mega-hubs so time to ship dropped to roughly 90 minutes per hub.

Cost: Claude API spend per hub is in the low single dollars, dominated by the deep content generation step. Total skill spend across all 12 hubs is well under $50. The bigger cost is operator time on review and approvals, which is the right place to spend operator time.

I am not publishing absolute traffic numbers per hub because the store competes in a specific niche and giving competitors a free read on which hubs lifted by how much would be operator malpractice. The pattern is consistent enough that I am willing to bet the same skill on the remaining 200+ hubs.

Now scaling to the remaining 200+ collections

With 12 hubs proven, the next phase is rollout. Three principles:

  1. Tier priority. Mega-hubs first (highest traffic potential), brand-hubs second (medium traffic, often easier wins), sub-collections last (low individual impact but lift the brand-hub authority through internal linking when done correctly).
  2. Batch via the audit pipeline. The collection-audit-pipeline orchestrator runs collection-analyze across every collection, sorts by composite score ascending and traffic potential descending, and feeds the worst-but-most-valuable hubs into collection-mega-hub-optimize in batches of 5-10 per session.
  3. Gate enforcement holds. Every hub goes through the same 15 gates. No exception for “just this one” no matter how small. Skipping a gate once is how the skill stops being trustworthy.

Target for the next 90 days: 50 hubs through the skill at the rate of roughly 15-20 per month. That covers all mega-hubs and the top brand-hubs in the brand. Sub-collection rollout is the second quarter.

What I learned building this skill

Three meta-lessons that apply beyond this specific skill:

  1. Production failures are the spec. Every hard gate in the skill exists because something broke in production and the fix had to be encoded so it could never break the same way again. If you are building a skill and you cannot point at a real failure each gate prevents, the gate is probably premature.
  2. Skill beats prompt at scale. A long prompt re-pasted into 12 conversations is 12 chances for one detail to drift. A skill invoked 12 times is the same workflow 12 times. The latter is auditable, the former is not.
  3. Per-tier templates beat one-size templates. A gel collection and a tools collection and a bundle collection have different reader intent and different competitive sets. Trying to write the same content template for all three produces mediocre output for all three. The skill ships six different section templates indexed by tier.

When this skill fits, and when to skip it

You will get value if:

  • You run a Shopify store with 50-500 collection pages
  • Most of your collection pages are thin (no body content, no FAQ, generic title)
  • You have a product knowledge base or are willing to build one (brand spec sheets, sales scripts, target customer profiles)
  • You are on Shopify Advanced or Plus where metafields and theme template overrides are available

You should skip if:

  • Your store has fewer than 50 collections (do it manually, the audit overhead is not worth it)
  • You have no product knowledge base and no time to write one (the skill refuses to write content without KB facts)
  • You are on Shopify Basic without theme template override access
  • Your collection pages are already deep and well-scoring (audit first, do not over-engineer what already works)

If you want me to run this on your store

I am working through the remaining 200+ hubs on my own brand and I have bandwidth for a small number of operator projects in parallel. If you run a Shopify store and your collection pages match the “thin grid, generic title, no schema” pattern I described above, send me a note with your store URL and a rough collection count. I will reply with a free composite-score audit on 5 of your hubs so you can see what the skill catches before deciding anything else.

Email: [email protected]. Subject line “collection audit” so it threads correctly.

FAQ

Is the skill open source?

The collection skill lives inside the broader Claude Growth Kit toolchain. The kit itself is paid (I reviewed it here). The collection-specific skill is something I built on top of the kit’s primitives, the kit does not ship with Shopify-specific skills. If you have the kit installed, you can clone my skill folder onto your install and run it against your store.

How long does the skill take per hub?

Active operator time is 90 minutes to 3 hours per hub, depending on tier. Most of that is reviewing AI output and approving live publishes. The skill itself runs in 10-20 minutes of Claude session time, but the operator-in-the-loop decisions (does this hero pick fit, is this internal link the right cross-hub, is this FAQ phrasing on brand) are the slow parts and they should be slow.

Does this work on Shopify Basic?

Partially. The deep content metafield works on every plan. The theme template override and the brand-suffix metafield opt-out require either Shopify Advanced (Online Store 2.0 sections everywhere) or Plus. On Basic you can still ship the content, but the title and template wins are gated on plan upgrade.

What if I do not have a product knowledge base?

You build one. The minimum viable KB is a markdown file per product line with: positioning, top 3 best sellers, target customer, technique workflow, upsell pairings, and competitive comparison. Two to four hours per product line. The skill is dramatically better with a KB than without, so investing the time pays back across every hub the skill ever touches.

Can you share the skill source?

Yes, for operators I am actively working with. I would rather walk through the skill on a call with operators who have context on their own store than drop a 600-line markdown file in a public repo where it is one Twitter screenshot away from being misused on stores it was not designed for. Email me if you want to see it.

What is the next skill you are building?

A multi-store inventory sync skill that handles a category I keep solving by hand: when two of my brands carry overlapping SKUs, keeping stock counts and reorder triggers in sync without double-counting. Same shape as this skill (workflow + gates + Telegram notify). I will write it up the same way.

I do this for operators

If you read this and your Shopify collection pages match the “thin grid, generic title, no schema” pattern, email [email protected] with your store URL. I will run a free 5-hub audit and reply with the composite scores plus what the skill would change.

If the audit looks useful and you want me to run the full optimization, we talk pricing after the audit, not before.

How to Connect Claude to Your Shopify Store (Without Writing a Single Line of MCP Code)

Hand-drawn illustration of Claude connected to a Shopify store via an MCP gear, with arrows showing two-way data flow.

The 90-second version

  • You can connect Claude to your Shopify store today in 5-30 minutes, depending on which of three paths fits you.
  • The easiest path (Claude Desktop’s Shopify connector) needs zero code, zero terminal, zero token paste. You click Connect, authorize in Shopify, and the 25 Shopify tools light up inside Claude.
  • If you run one store, the connector is the fastest path. I run several stores from Hanoi, so I use custom-app Admin tokens (Path C) instead, which skips the connector’s constant store-switching.
  • Important: Shopify deprecated the old “Develop apps” custom app path on January 1, 2026 for new apps. Older tutorials that walk through it are now stale. This guide covers the three modern paths only.
  • Below: three setup paths in a comparison table, 5 prompts I run weekly, 5 ops routines you can schedule with Anthropic’s new Routines feature (sales pulse, OOS watch, slow movers, ticket aging, refund anomalies), and 5 common errors so you skip them.

Updated July 2026 with how I actually connect across multiple stores, and why the built-in connector is not it.

Why this matters if you run a Shopify store

The promise of AI for ecom operators is straightforward: ask a question in plain English, get an answer that pulls real data from your store. “Which products lost stock this week?” “Show me orders over $200 from California in the last 30 days.” “Which collections have no description tag?”

Without MCP (Model Context Protocol), Claude can only guess. It does not see your store. You paste a CSV, it answers, you paste another CSV, it answers again. The loop is slow and the data is always stale.

With MCP, Claude reaches into your Shopify Admin API directly. You ask, it queries, it answers, all in one turn. No CSVs. No spreadsheets. No copy-paste between tabs.

The reason most operators have not done this yet is the perception that MCP is a developer thing. You read the spec, you see TypeScript, you bounce. I bounced too, twice. Then I realized you do not need to build an MCP server. You install one that already exists, and you wire it to your store with a token.

What MCP actually is, in 60 seconds

Think of MCP as a universal adapter between Claude and any system that has an API. Shopify has an API. Google Search Console has an API. Stripe has an API. Each one normally needs a custom integration. MCP standardizes the wiring so Claude can talk to all of them through one protocol.

An MCP server is a small program that translates between Claude’s protocol and a specific API. Someone wrote the Shopify MCP server. Someone wrote the GSC MCP server. You do not have to write either. You install them and tell them how to authenticate to your store.

That is the entire mental model. Once it clicks, the setup is almost boring.

Heads-up: Shopify deprecated the “Develop apps” shortcut on January 1, 2026

If you searched this topic 8 months ago, you would have hit a one-click path called “Settings β†’ Apps and sales channels β†’ Develop apps”. That path is now retired for new apps. Shopify’s official notice:

“As of January 1, 2026, you can no longer create new legacy custom apps. This does not impact any existing apps.” (Shopify Changelog)

If you already have a legacy custom app installed (a token starting with shpat_), it still works. Do not delete it; you cannot recreate it as legacy. If you are starting fresh today, pick one of the three modern paths below.

Three modern paths, pick the one that fits

All three end in the same place: Claude can read your store. They differ in how much setup time you accept up front.

Path Setup time Code required Best for
A. Claude Desktop connector (UI) ~5 minutes None Solo operator on 1 store, wants chat UI, no terminal
B. Shopify AI Toolkit MCP (CLI) ~15 minutes One command Operator using Claude Code, 1+ store, comfortable in terminal
C. Custom app + Admin token ~30-60 minutes Some (token setup) Multi-store operators (no store-switching), agencies, scripted automation

Here is what I actually run, and why. If you have one store, use Path A, the connector. It is the fastest and it is what I recommend to most operators I onboard. But I run several stores, and the built-in connector makes you switch the active store every time you change context. That got old fast. So across my stores I use Path C: one custom app per store, its Admin API token dropped into a local config, and Claude talks to whichever store I name, no switching. It also scripts cleanly for my daily checks. Path B (the CLI dev tools) is useful for inspecting the Admin GraphQL schema, but it is not how I run day-to-day store ops.

Path A: Claude Desktop connector (no code, ~5 minutes)

This is the path most operator clients pick, and it is the one Shopify and Anthropic both endorse for non-developers. Step by step:

  1. Install Claude Desktop if you do not already have it. You need a Claude.ai Pro, Max, Team, or Enterprise subscription.
  2. Open Claude Desktop. In the left sidebar, click Customize, then Connectors.
  3. Click the + icon at the top of the Connectors panel. A directory of available connectors opens.
  4. Find Shopify in the directory and click Connect.
  5. Claude redirects you to your Shopify admin to authorize the connection. Review the data access level Shopify shows. You can decline any scope you do not want.
  6. Approve. Shopify returns you to Claude. The Shopify connector now appears in your sidebar with 25 available tools (search products, get shop info, list orders, list customers, update product, and more).

That is the entire setup. No token to paste, no config file to edit, no CLI command to run. Test it by asking Claude: “Using Shopify, show me my 5 most recent orders.”

Reference: Shopify’s official guide + Claude Shopify connector page.

Path B: Shopify AI Toolkit MCP via Claude Code (~15 minutes)

If you live in a terminal and write prompts as part of your workflow, this path gives you scripted control. The Shopify AI Toolkit is an official Shopify package, open-sourced on April 9, 2026 under MIT license at github.com/Shopify/Shopify-AI-Toolkit.

Prerequisites:

  • Claude Code installed (install guide). Quick check: claude --version should print a number.
  • Node.js 18 or higher (node --version to confirm)
  • A Shopify Partner account, free at partners.shopify.com

Install the MCP server with one command:

claude mcp add --transport stdio shopify-dev-mcp -- npx -y @shopify/dev-mcp@latest

Then authenticate to your store using the Shopify CLI:

shopify auth login

Restart Claude Code. The connector exposes 7 tools (search docs, validate GraphQL queries, execute store ops). Verify with: “Using shopify-dev-mcp, show me the GraphQL schema for the Order type.”

If you have multiple stores, repeat the steps with separate alias names like shopify-store-a, shopify-store-b. Reference: Shopify AI Toolkit docs.

Path C: Custom app + Admin token (this is what I actually use)

This is the path I run across my stores, so I will be specific. You create a custom app, get its Admin API access token, and put that token in a local config that Claude reads. With the token, Claude talks straight to that store’s Admin API and you never touch the connector’s store picker.

If your store is older and already has a legacy custom app (token starts with shpat_), just reuse that token. It still works, it never expires, and you cannot recreate a legacy app, so do not delete it. You are done; skip the rest of this section.

If it is a new store, legacy custom apps are gone (see the January 2026 note above), so you build it in the Dev Dashboard. Shopify made this more work than the old copy-paste: there is no “reveal token” button anymore. You get a Client ID and Secret, then run a one-time OAuth exchange that returns a permanent offline access token. Here is the exact flow I use.

Step 1: Create the app

At dev.shopify.com, pick “Start from Dev Dashboard”, name the app, and click Create.

Shopify Dev Dashboard Create an app screen, naming a custom app khuetran-ops.

Step 2: Set the scopes and the redirect URL

In the app’s Access section, enter the Admin API scopes as a comma-separated list. My read-only set for store ops is read_products,read_orders,read_all_orders,read_inventory,read_locations,read_analytics,read_customers (add write_products only if you want Claude to make changes). Check Use legacy install flow, which is what enables the browser OAuth with a redirect. Then set Redirect URLs to the exact local address your script will listen on: http://localhost:3456/callback. If this does not match your script exactly, the browser step fails with no useful error. This is the single most common mistake. Release the version.

Access screen showing the comma-separated Admin API scopes, Use legacy install flow checked, and the Redirect URL set to http://localhost:3456/callback.

You can change scopes later by shipping a new version and re-approving. You do not have to rebuild the app.

Step 3: Copy the Client ID and Secret

Open the app’s Settings tab and copy the Client ID and Client secret. These are not the access token yet; they are what you exchange for one.

App Settings tab showing the Client ID (partly redacted) and a hidden Client secret with a Rotate button.

Step 4: Run a one-time OAuth script

This short script replaces the old copy-paste. It opens the browser, you approve once, and it exchanges the code for a permanent offline token. Python, standard library, nothing to install:

#!/usr/bin/env python3
"""
shopify_oauth_token.py - get a PERMANENT offline Admin API token for your OWN Shopify store.

One-time OAuth over localhost. Requires the custom app's Client ID + Client Secret
(Dev Dashboard -> your app -> Settings) and the redirect URL
http://localhost:3456/callback registered on the app (Access -> Redirect URLs).

Run:
  python shopify_oauth_token.py --shop your-store.myshopify.com --client-id XXX --client-secret YYY

The browser opens, you click Install/Approve once, and it prints an offline access token
(shpat_...) that DOES NOT expire. Paste that token into your .env.  Stdlib only, no pip installs.
"""
import argparse, http.server, secrets, urllib.parse, urllib.request, json, webbrowser, threading, sys

PORT = 3456
REDIRECT = f"http://localhost:{PORT}/callback"   # MUST match the Redirect URL registered on the app

def main():
    ap = argparse.ArgumentParser()
    ap.add_argument("--shop", required=True, help="your-store.myshopify.com")
    ap.add_argument("--client-id", required=True)
    ap.add_argument("--client-secret", required=True)
    ap.add_argument("--scopes",
                    default="read_products,read_orders,read_all_orders,read_inventory,"
                            "read_locations,read_analytics,read_customers")
    a = ap.parse_args()
    shop = a.shop.replace("https://", "").replace("http://", "").strip("/")
    state = secrets.token_urlsafe(16)
    holder = {}

    # No grant_options[]=per-user  => OFFLINE access mode => permanent token.
    authorize = (f"https://{shop}/admin/oauth/authorize?client_id={a.client_id}"
                 f"&scope={urllib.parse.quote(a.scopes)}"
                 f"&redirect_uri={urllib.parse.quote(REDIRECT)}"
                 f"&state={state}")

    class H(http.server.BaseHTTPRequestHandler):
        def log_message(self, *_):
            pass
        def do_GET(self):
            q = urllib.parse.parse_qs(urllib.parse.urlparse(self.path).query)
            if "code" not in q:
                self.send_response(400); self.end_headers(); return
            if q.get("state", [""])[0] != state:
                holder["err"] = "state mismatch (possible CSRF) - aborting"
                self.send_response(400); self.end_headers(); return
            holder["code"] = q["code"][0]
            self.send_response(200); self.send_header("Content-Type", "text/html"); self.end_headers()
            self.wfile.write(b"<h2>Auth OK - you can close this tab and return to the terminal.</h2>")
            threading.Thread(target=self.server.shutdown).start()

    srv = http.server.HTTPServer(("127.0.0.1", PORT), H)
    print(f"Opening the browser to authorize on {shop} ...")
    print(f"If it does not open, paste this URL into your browser:
{authorize}
")
    webbrowser.open(authorize)
    srv.serve_forever()  # blocks until the callback is received

    if "code" not in holder:
        print("No auth code received:", holder.get("err", "(cancelled)")); sys.exit(1)

    body = urllib.parse.urlencode({
        "client_id": a.client_id, "client_secret": a.client_secret, "code": holder["code"],
    }).encode()
    req = urllib.request.Request(f"https://{shop}/admin/oauth/access_token", data=body)
    resp = json.load(urllib.request.urlopen(req, timeout=30))

    token = resp.get("access_token", "")
    print("
=== AUTH SUCCESS ===")
    print(f"  store : {shop}")
    print(f"  scope : {resp.get('scope')}")
    print(f"  token : {token}")
    if "expires_in" in resp:
        print("  WARNING: this token expires - you requested an ONLINE token. Re-run for offline.")
    else:
        print("  offline token (no expiry) - paste it into your .env, e.g.  SHOPIFY_TOKEN_STOREA=" + (token[:12] + "..." if token else ""))

if __name__ == "__main__":
    main()

Run it with your store domain, Client ID, and Client Secret:

python shopify_oauth_token.py --shop your-store.myshopify.com --client-id XXX --client-secret YYY

Step 5: Approve, and you have your token

The browser opens Shopify’s install screen. Approve it.

Shopify install-app approval screen for the custom app on a test store, listing the data it can access.

The tab lands on a local success page, and the terminal prints your offline access token (shpat_...). It has no expiry. Paste it into your config or .env, and Claude can reach that store.

Browser showing the localhost callback success page reading Auth OK, you can close this tab and return to the terminal.

One warning that matters: take the offline token, not the online one. The online token (and the client-credentials token) expires in about 24 hours, which makes your config go stale every day. The script above requests offline by default, so the token you get is permanent.

Why I use this over the connector: with several stores, the connector makes you switch the active store constantly. With one token per store in my config, I just say “using store A, do X” and it goes. That is the difference that matters at multi-store scale.

Verify it works with one prompt

Open Claude (Desktop for Path A, Claude Code for Path B). Paste this prompt:

Using my Shopify store, list the 5 most recently created products. Show the title, price, and inventory quantity for each.

If the wiring is correct, Claude returns a clean table of 5 products from your live store. If you see “I do not have Shopify access” or an authorization error, jump to the “Errors” section below.

5 prompts I run on my stores every week

This is where the workflow pays off. These are not “show me a dashboard” prompts. They are ops decisions you would otherwise make in 4 browser tabs and a spreadsheet.

1. “Show me products with low stock and recent sales velocity”

Pull all products with current inventory below 10 units. For each, show the number of orders containing that product in the last 30 days. Sort by orders descending. I want to know what to reorder first.

Output: a ranked list of restock priorities, not just a low-stock report. This is the difference between data and decision.

2. “Audit collection pages with no description or no products”

List all collections that have either an empty body_html field or zero products assigned. Format as a table with the collection title and which problem applies.

I caught 12 broken collections on one store doing this in 30 seconds. Collections with no products are dead pages in search, and Google penalizes them over time.

3. “Find duplicate products by title fuzzy match”

Pull all active products. Group titles that are β‰₯80% similar by token overlap. Show me clusters of 2 or more.

This finds variants accidentally listed as separate products, a common mess on stores that ran imports from multiple sources. The Shopify admin UI does not show this. Claude can.

4. “Which orders had high refund value last month and what was the most common reason”

Pull orders from the last 30 days with refund amount above $50. Show order number, refund amount, refund reason if recorded. Then summarize the top 3 reasons by frequency.

This is a customer service signal you would otherwise dig out of Shopify’s refunds export plus a CSV scrub. Claude does it in one turn.

5. “Compare conversion rate of products with vs without descriptions over 200 words”

For each active product, calculate word count of body_html, then bucket as short (under 200 words) or long. Compare orders-per-1000-views (approximation: orders Γ· products of similar age Γ— 1000) between the two buckets.

This is a directional analysis, not a perfect controlled test, but it surfaces the “do my long descriptions actually convert better” question with real numbers.

5 errors I hit so you can skip them

Error 1: Path A connector authorization screen never returns me to Claude

Cause: Browser blocked the popup or you signed into the wrong Shopify account. Fix: confirm the Shopify admin tab is your target store, retry the Connect button, allow popups for claude.ai. The redirect back to Claude Desktop happens automatically when authorization completes.

Error 2: Path B install command errors with “claude: command not found”

Cause: Claude Code is not installed or not on your PATH. Run which claude (macOS/Linux) or where claude (Windows). If empty, install from the official docs.

Error 3: Path B MCP server hangs on first run

Cause: npx -y is downloading the @shopify/dev-mcp package the first time. On a slow connection this can take 60-120 seconds. Wait it out. Subsequent runs are instant because the package is cached locally.

Error 4: Claude returns “I cannot access that data” even though the connector is active

Cause: You declined or never granted the scope that entity needs. Path A: revisit the connector authorization page in Claude Desktop and re-approve with broader access. Path B: rerun shopify auth login and confirm the Partner account has scope access to the target store.

Error 5: I get answers but the numbers feel off

Cause: Claude returned partial data because the query hit a pagination cap. Shopify GraphQL pages return 250 records at a time. For “every order this year” type questions, narrow by month or filter by status, then ask Claude to aggregate. Mention in your prompt: “paginate through all results before summarizing.”

Bonus: schedule 5 ops routines with Claude Code Routines

Once the connector is live, the highest-impact move is to stop running these prompts ad hoc and let Claude run them on a schedule. Anthropic shipped a feature called Routines on April 14, 2026 (currently in research preview) that does exactly this. It is included on Pro, Max, Team, and Enterprise plans.

What Routines are, briefly

A routine is a saved Claude Code configuration: a prompt, optionally one or more GitHub repositories, and the connectors you want it to use. Routines run on Anthropic-managed cloud infrastructure, so they keep running when your laptop is closed. Three trigger types are supported:

  • Schedule, hourly, daily, weekdays, weekly, or a one-off at a specific timestamp. Minimum interval is 1 hour. Custom cron via /schedule update.
  • API, a per-routine HTTPS endpoint you can POST to with a bearer token. Wire it to your monitoring tool, deploy pipeline, or any system that emits a webhook.
  • GitHub event, pull request opened/merged/labeled, release published, with filters by branch, author, labels, etc.

Create routines from claude.ai/code/routines, from the Routines tab in Claude Desktop’s sidebar, or with /schedule in the CLI. All three surfaces sync to the same cloud account. Source: Anthropic Routines docs.

Important: the connectors a routine can use are the ones connected on your claude.ai account (claude.ai/customize/connectors), not local MCP servers added via claude mcp add on your machine. If you set up Shopify via Path A, your routines can already see it. If you set up via Path B only, you also need to add the Shopify connector to your claude.ai account for routines to reach it.

Below are 5 routines I run for store operators. Times are local. Drop them into the New routine form, attach the Shopify connector, set the schedule, and forget about them.

Routine 1: Daily sales pulse, schedule “daily at 8 AM”

Using my Shopify store, compare yesterday’s gross sales, order count, and AOV against the 7-day rolling average. Flag any metric that moved more than 15% in either direction. Reply with only the 3 most material deltas in plain text. If no metric moved more than 15%, reply with one sentence confirming the day was normal.

Why daily: catches a tracking break, a viral SKU, or a Friday discount surprise before it compounds across a week.

Routine 2: Out-of-stock watchlist, schedule “hourly” (or “every 4 hours” via custom cron)

Using my Shopify store, list products currently at zero inventory that had at least 5 unit sales in the last 14 days. Group by vendor. Skip products tagged ‘discontinued’. Reply with the list grouped, or one sentence if nothing matches.

Why intraday: a bestseller selling out at 2 PM and not getting flagged until next morning is a full afternoon of lost revenue. If hourly is too noisy for your store, raise the interval via /schedule update.

Routine 3: Slow-mover inventory, schedule “weekly on Monday”

Using my Shopify store, show products with inventory greater than 50 units and zero sales in the last 30 days. Sort by inventory value descending. Reply with a table I can act on for discount, bundle, or kill decisions.

Why weekly: slow movers eat cash. A weekly review keeps the catalog honest without becoming noise.

Routine 4: Open ticket aging, schedule “daily at 5 PM”

Using my Shopify store, pull orders from the last 30 days that have notes or tags indicating an open customer issue. Show only those unresolved for more than 48 hours, with customer email and order value. Sort by order value descending.

Why daily: a $400 customer waiting 3 days for a reply is a refund risk and a 1-star review risk. Prioritize by value, not by inbox order.

Routine 5: Refund anomaly check, schedule “daily at 9 AM”

Using my Shopify store, calculate yesterday’s refund rate (refund count Γ· order count) and compare to the 30-day average. If yesterday exceeds the average by more than 2x, list the refunded orders and group by refund reason. Otherwise, reply with one sentence confirming the rate is normal.

Why daily: refund spikes mean a product defect, a shipping problem, or a fraud wave. Catching it on day 1 saves a 7-day cleanup.

You do not need all five. Start with Routine 1 (sales pulse) since it is the broadest signal. Add the others one at a time as you trust the prompts. Routines runs are subject to a daily run cap on your plan; one-off runs do not count against the cap. See claude.ai/settings/usage for your current allowance.

If you do not have Routines (Free plan, or admin-disabled in your org), you can still pull these prompts manually each morning, or wire them into a local cron job that pipes into Claude Code. The prompts themselves work in any setup.

What you can’t do (honest limits)

I want to be straight about this so you do not buy into AI hype:

  • This does not write code into your theme. Claude can read Liquid templates if you give it read_themes scope, but pushing template changes through MCP is risky and I do not recommend it. Use the regular theme editor.
  • This is not a dashboard. You ask, you get an answer in chat. Beautiful charts are not the output. The output is a decision, made faster.
  • Large queries cost real tokens. Asking for “every order in 2024” pulls 12 months of data into Claude’s context. That is expensive and slow. Batch by month, narrow by filter, paginate.
  • Multi-store takes a one-time setup per store. Each store needs its own token or connector entry. Once that is done (Path C makes it painless), you pick a store with a phrase in your prompt, not by clicking around. There is no magic “all my stores at once” button; you name the store you mean.
  • Read-only is safer. Write scopes (write_products, write_orders) are powerful and irreversible. A wrong prompt can update 200 products instantly. Keep read-only until you trust your prompts.

Who this is for, who it is not for

You will get a lot out of this if:

  • You run a Shopify store and already use Claude (or ChatGPT) for ops thinking
  • You spend more than 2 hours a week pulling reports from Shopify admin
  • You want to start small (read-only queries) before scaling to automation
  • You like clear answers in plain English more than building dashboards

You should skip this if:

  • You have under 100 orders/month (the manual reports are still faster)
  • You are looking for a no-code automation platform (try Zapier or Make instead)
  • You need a polished visual dashboard for your team (try Shopify Analytics or a third-party BI tool)
  • You expect AI to make ops decisions for you without review (it surfaces signals; you still call the shots)

FAQ

Which of the three paths should I pick?

One store, mostly chatting with your data: Path A (the connector). Multiple stores, or you want to script daily checks: Path C (custom app + Admin token), which is what I run because it skips the connector’s store-switching. Path B (the CLI dev tools) is mainly for inspecting the Admin GraphQL schema. Single-store operators I onboard usually start on Path A; multi-store operators are better off on Path C from the start.

Is this safe for my store?

Both Path A and Path B grant scopes you approve. The worst Claude can do is what those scopes allow. Approve read-only first, watch what Claude does for a week, then add write scopes when you trust your prompts. For Path A, you can revoke the connection any time inside Claude Desktop’s connector settings or in Shopify admin under installed apps. For Path B, removing the MCP entry from your config kills access instantly.

How much does this cost to run?

Path A uses your Claude.ai subscription (Pro, Max, Team, or Enterprise) and counts against your monthly message limit. Path B uses Claude Code billed per token by Anthropic. A typical operator query (one of the 5 above) uses 5-15k tokens including Claude’s response. At current pricing that is fractions of a cent per query. I spend under $20 per month on Claude API across my stores.

Does this work with multiple stores?

Yes, and it is the main reason I use Path C. Path A: authorize each store in the connector picker and switch in the sidebar, which is fine for one or two but tedious past that. Path C: give each store its own custom-app token in your config, then say “using store A, do X” in the prompt, no switching. Running several stores is exactly what pushed me off the connector and onto tokens.

Can I use this with Shopify Plus or just standard plans?

Standard, Advanced, and Plus all work. Custom apps are available on every paid plan. The Admin GraphQL API endpoints behave the same across plan tiers.

What about writing back to Shopify (update products, tag orders)?

You can, after you approve write access for the connector. Path A: on the connector authorization screen, approve the data access tier that includes the write tools you need. Path B: ensure the Partner account has the write scope on the target store. Then prompts like “update product X tag to include ‘restocked'” work. I do this only for batch tag updates and inventory adjustments, and only after testing on a single product first. Mass-update with care.

Routines is labeled “research preview”, is it safe to rely on?

Anthropic shipped Routines on April 14, 2026 in research preview. Behavior, limits, and the API surface may change. For ops routines that fire daily and only report data back to you, the risk is low: if a routine breaks, you notice the next morning and re-create it. For routines that write back to Shopify or take destructive action, I would wait for general availability or pair every write with a manual review checkpoint. Source: Anthropic Routines documentation.

Is this the same as Shopify Sidekick?

No. Shopify Sidekick is Shopify’s own AI assistant embedded in the admin. It is good for in-admin chat but locked to Shopify’s product. The MCP route gives you Claude (or any MCP-capable AI) with full Admin API reach, and you control the prompts, the scopes, and the data flow. They serve different use cases.

Related, the same operator-audit approach on the paid side: the 4 money leaks I found auditing my own Google Ads.

I wire this up for operators

If you read this and thought “great idea, but I do not have 30 minutes to fight with config files and tokens”, I do this as a paid service. I come in, set up Claude + Shopify MCP on your machine, run a verify session with you, and leave you with 10 starter prompts tailored to your store.

Email [email protected] with your Shopify domain and the data questions you wish you could ask in plain English. First five operators I work with get the setup session free. After that it is $300 flat (one-time, includes a 30-minute Loom walkthrough of the 10 prompts).

Claude Growth Kit review: 309 articles audited and 9 refreshed, an honest take

claude-kit-hero-v4 wide hero
Editorial illustration: an open laptop displaying a clean dashboard of modular AI skill icons connected by orange data lines.

πŸ“Œ TL;DR Β· VERDICT Β· 60-SECOND READ

Claude Growth Kit by Nguyα»…n Minh ThαΊΏ is a 135-skill toolkit for blog SEO that I have run on production sites and graded against my own audit framework. After using it to audit 309 ND Nail Supply articles end-to-end in two days and to refresh nine of those articles to publish, my honest read is: this is the most complete blog-and-content-portfolio toolkit I have used inside Claude Code, with one clear blind spot for Shopify operators that I will get to below. Final score: 86 out of 100.

WHO SHOULD LOOK AT THIS

  • Blog-driven GTM (SaaS, publisher, affiliate, content site), full fit, top recommendation
  • Multi-language publishers, built-in localization + hreflang is rare at this level
  • Shopify wholesale or DTC, partial fit: blog content yes, but PDP content, collection-page automation, and GMC feed work all sit outside the current scope
  • Single-blog hobbyist with no SEO goals, overkill; you do not need 135 skills to publish a recipe

A note on bias before we start. I bought into this toolkit because the blog audit problem at ND Nail Supply was eating my weekends, and the kit looked complete on paper. I have now used it on real production data. This review is favorable, but it is favorable because the tool earned that grade against the actual checks below, not because of any relationship with the author. Anything I think is missing or unfinished is in the gaps section halfway down.

WHAT IT IS

135 skills + 31 specialist agents for the whole blog SEO lifecycle

Underneath the marketing label, the kit is four bundles assembled into one Claude Code project: claude-blog (44 skills, content writing and audit), claude-seo (38 skills, technical and on-page audit), geo-seo (18 skills, AI search citation readiness for Google AI Overviews, ChatGPT web, Perplexity), and Google API integrations (9 skills covering GSC and GA4). On top of that sit five entry-point pipelines that orchestrate everything end to end.

The five pipelines you actually invoke

  • /claude-growth-onboarding: wizard that scrapes your live site, builds your site config (BRAND.md, VOICE.md, audience matrix, fact-source ledger) so the writer matches your voice without you typing it out.
  • /blog-pipeline: keyword to published draft in seven phases, research β†’ cluster β†’ brief β†’ write β†’ audit β†’ image β†’ publish. State is checkpointed, resume on failure is built in.
  • /blog-audit-pipeline: portfolio audit. Five per-article checks (quality + decay + schema + sourcing + AI citability) plus five cross-article checks (cannibalization, cluster authority, link reciprocity, anchor diversity, sitemap).
  • /blog-refresh-pipeline: lane-routes existing articles into REWRITE, REFRESH, MERGE, or SKIP based on decay signals. Backs up first, verifies after, one-command rollback.
  • /seo-pipeline: technical SEO and AI-search audit at the domain level. 20-agent fan-out covering crawl, index, Core Web Vitals, schema, GEO accessibility, llms.txt, brand authority.

The skills underneath the pipelines are individually callable. You do not have to run a full pipeline to use one diagnostic. If you only want a cannibalization scan on one article pair, /blog-cannibalization works standalone.

REAL-WORLD TEST

I ran it on a 309-article production blog

I run three US ecom brands from Hanoi. The ND Nail Supply blog has 309 articles across 13 topic clusters, written over five years by a rotating cast of contributors. Nobody had run a deep audit since the second year. Decay had set in quietly, in patterns nobody could see by clicking around. This is the situation the kit was built for, and the test was: would it actually catch what manual review had missed?

In two days the audit pipeline graded every article on the five-category 100-point rubric and produced the cross-article maps. The numbers that surfaced lined up with what I already suspected but had not been able to prove. Schema completeness scored 10 out of 100 across the entire portfolio because the theme was emitting Liquid microdata that the Rich Results validator does not read. The cannibalization map found 22 pairs scoring β‰₯0.4 Jaccard, the worst at 1.0. The decay tier produced 34 high-decay articles plus 194 with zero impressions over a year. External sourcing came in at 62.8% of articles with no outbound citations.

From that audit I picked nine articles and ran them through the refresh pipeline. The lane router classified five as REWRITE (zero impressions for a year), three as REFRESH plus weak-section rewrite, and one as SURGICAL because it was a listicle ranking via Google Images. Every refreshed article went through factcheck and the 100-point score gate before publish. None of the nine breached publish threshold first try, but the pipeline surfaced the exact gap (missing sources, thin H2, weak intro), I patched, and they crossed.

The full numbers and methodology live in the ND case study. The point for this review is that the kit produced a real prioritized refresh queue with decision rules per item, in two days, on a blog where manual review had failed.

WHAT WORKS REALLY WELL

Six things the kit gets visibly right

1. The scoring rubric is transparent, not a black box

The 100-point quality rubric lives in a markdown file called quality-rubric.md. You can read exactly what content depth, SEO, E-E-A-T, technical, and UX cost in points, and what each subcomponent measures. When the audit says “73/100” you can trace why. That is rare for AI tooling and it is the single biggest reason I trust the score.

2. Decision rules per article type are concrete

The kit defines nine article types (definition, how-to, comparison, listicle, product review, pillar, case study, news-trend, blog post) and writing discipline differs per type. A listicle demands vendor screenshots. A how-to demands code blocks plus screenshots per step. A pillar demands 4,000 to 8,000 words and hub-and-spoke cluster mapping. You are not just calling a generic “write me an article” model, you are calling a type-specific instruction set.

3. Three-layer config cascade keeps voice consistent

Universal base (banned phrases, em-dash cap, CTA templates) β†’ format template (per-article-type structure) β†’ site-specific overrides (BRAND.md, VOICE.md, audience matrix, fact-source ledger). When you operate two or three sites the per-site overrides layer is what stops voice drift. I run three brands and the cascade catches voice mistakes before they hit publish.

4. Multi-language is first-class, not an afterthought

/blog-multilingual ships one article to all 8+ configured languages with a single command and emits the hreflang matrix automatically. /blog-locale-audit finds gaps where one locale is missing pieces. For publishers running parallel English plus another market this is rare engineering at this depth.

5. Refresh-mode safety is properly designed

Refresh-mode rules are different from write-mode rules, which is the design choice that earned trust fastest. The refresh audit only flags problems the update introduces. Old issues already published are not re-penalized. Backup is automatic, and rollback is one command if the refresh underperforms. The other tooling I tried failed this exact test, refreshing existing posts as if they were brand new and breaking rank.

6. Real production examples ship inside the kit

The kit includes a full sample-article folder with brief, draft, audit report, factcheck, ranking baseline, workflow log, plus a sample-audit folder showing the SEO pipeline deliverable. You can read the actual artifacts the kit produces before running it on your site. The vendor’s English content site, nextgrowth.ai, is the live production proof.

HONEST LIMITS

Where the kit shows its blog DNA

Every toolkit is opinionated. This one was built with a publisher and content marketer mindset, and three of the limits below are direct consequences of that scope. If your business is Shopify-first ecommerce, you will hit these in the first month.

No Shopify product or collection page automation

There is no built-in skill for writing product descriptions from product data, optimizing PDP titles and meta from a variant matrix, generating schema for individual products, or auditing Shopify collection pages on a content rubric the way blog articles are audited. I built my own collection-audit pipeline on top of the kit for my brands (modeled on its blog-audit, since the rubric pattern is reusable), but that work is mine, not the kit’s. For Shopify operators with hundreds of SKUs needing PDP and collection content at scale, expect to build or buy a separate layer.

No Google Merchant Center feed troubleshooting

For paid acquisition on Shopify, the GMC feed is half of Performance Max ROAS. The kit has no skill for auditing disapprovals, surfacing suppressed products, generating or fixing the product feed XML, or scoring the feed against Google Shopping policy. Adjacent: the seo-ecommerce skill exists but it diagnoses the site, not the feed.

Social repurposing writes the copy but does not post

/blog-repurpose produces Twitter or X threads, LinkedIn posts, YouTube scripts, Reddit posts, and email newsletter excerpts from a published article. What it does not do is auto-post to any of those platforms. You copy-paste. For a single-person operator that is fine. For a team running daily distribution it is a friction point.

Internal linking is audit-only, not auto-apply

/blog-internal-links audits bidirectional links, detects orphans and dead-ends, and verifies the pillar-to-spoke ratio. When the audit says article A should link to article B, you must apply the change manually. The conservative choice (do not auto-edit published content) is defensible, but in production the gap means the link mesh stays a queue item that often does not get done.

No email dispatch, no campaign builder

The repurpose skill produces email newsletter excerpts. That is the end of the email story. There is no integration with ESP (Klaviyo, Mailchimp, ConvertKit), no segmentation logic, no automation workflow builder. For content teams that treat the newsletter as a separate channel with its own discipline this is the right boundary. For operators wanting an end-to-end content-to-email pipeline it is not yet there.

FIT-CHECK

Who should look at it, and who should not

Full fit: Blog-driven GTM operators. SaaS content marketing, affiliate or publisher sites, B2B content teams, content cluster builders, multi-language publishers. If your business depends on long-form content compounding organically, this is the most complete toolkit I have used for that workflow inside Claude Code.

Partial fit: Shopify wholesale or DTC operators. Use it for blog content. Plan to build or buy your own pipeline for product page writing, collection page automation, and GMC feed work. The kit handles about half of an ecom store’s content surface. The other half (PDP at scale, collection content, feed quality) sits outside its current scope.

Partial fit: Local business sites. Local SEO components exist (seo-local, seo-maps) and the blog and audit pipelines cover content. The kit is more than enough if your local business markets through educational content. Less essential if you market purely through GBP and Google Ads.

Not a fit: Single-blog hobbyists. You do not need 135 skills to publish a personal essay. The complexity will get in the way. Use simpler tooling, or learn one or two skills from the kit standalone without the full pipeline.

VERDICT

Final score: 86 out of 100

27/30

Content quality + workflow depth

22/25

SEO + audit coverage

13/15

E-E-A-T + factcheck discipline

11/15

Ecom commerce coverage

13/15

Multi-site + multi-language ops

Eighty-six is a recommend from me. The kit lost points only on ecom commerce coverage (no PDP content factory, no GMC feed work) and minor E-E-A-T (the score is transparent, the factcheck pass is rigorous, but the kit cannot manufacture experience signals you do not already have). On every other axis it scored at or close to ceiling.

If you are running a blog-driven GTM, run the onboarding wizard and try the audit pipeline on your existing portfolio first. The audit output alone, even before you write a single new article, is worth understanding. If you are running Shopify, do the same on your blog, and plan separate tooling for your product surface.

FREQUENTLY ASKED

Questions readers ask me about this kit

Does this replace a content writer or content team?

It replaces the structural work (research, brief, audit, formatting, schema) and the rote draft pass. A human still has to review the draft for first-party experience, edit for voice nuances, and decide the editorial calendar. If you previously had a writer doing 100% of the work, you can probably get to 60-70% machine output with strong human review on top. If you had no writer and were publishing nothing, the kit removes the gating step.

Will the audit pipeline work on a non-WordPress blog?

Audit yes, publish maybe. The audit reads from sitemap and crawled HTML, which is platform-agnostic. The publish phase has WordPress as the deepest integration (REST API auto-publish, Rank Math meta sync). For Shopify blog or Webflow or static-site-generator blogs, the audit works fine, the publish step requires you to copy the draft into your CMS manually or wire a small adapter.

How does it handle hallucinated statistics in articles?

There is a hard factcheck gate before publish. /blog-factcheck opens every cited source URL, verifies the statistic exists in the source page, and blocks publish if any number is missing its source. The fact-source ledger per site tracks which numbers have been verified and which are still unsourced. This is the most rigorous factcheck I have run on AI-generated content.

Is there a free tier or trial?

The kit is a downloadable installable into your local Claude Code project. There is no SaaS dashboard. Whether there is a trial window for evaluation is up to the author’s distribution policy at the time you check. The link at the bottom of this review points to the canonical distribution page.

What about competition (other AI blog tools)?

I have looked at SurferSEO’s AI Writer, Surfer’s NEURON, Jasper, Frase, and a handful of indie tools. The closest comparison is Surfer plus Frase plus a separate audit tool, glued together. The Claude Growth Kit’s advantage is that everything lives in one project state, the rubric is markdown you can edit, and the agent layer means new article types or audit checks can be added without waiting for a vendor release. The disadvantage is that you need to be comfortable working in Claude Code rather than a polished web UI.

Claude Growth Kit is built and maintained by Nguyα»…n Minh ThαΊΏ. The canonical link is https://ongboit.com/claude-growth/. I am not affiliated with the author and this review is uncompensated.

5 branded search mistakes that quietly burn revenue (and the fixes that recover it)

branded-hero-v4 wide hero
Editorial illustration: a Google search bar with branded keywords highlighted in orange and dollar coins flowing into a protective shield.

πŸ“Œ TL;DR Β· 60-SECOND READ

Branded search is the most undervalued line item in most paid acquisition stacks. Operators cut it when the dashboard looks “wasteful” and miss that the campaign was protecting their highest-intent buyers from being intercepted by competitors. Below: the five branded-search mistakes I diagnose most often across Shopify wholesale, WooCommerce, local business, and content sites, each with the exact fix, the typical cost, and what I run during the 7-day Audit.

KEY TAKEAWAYS

  • Branded ROAS > 6Γ— is not “obvious money you would have earned anyway”, it is the floor you are defending
  • Branded clicks spike when ANY promotional activity hits the niche, branded budget cap then leaves money on the table
  • Competitor brand-bidding is real and growing; defense bid is one of the cheapest moats per dollar
  • Pausing branded during OOS trains Google to demote you, then competitors fill the SERP for free

If you operate a paid acquisition stack of any meaningful size, the branded search campaign is the single channel most likely to be misread by your dashboard. This is the post I send to founders and operators before our intro call so we can skip the basics and get to the actual diagnostic. Each mistake below comes from a real audit pattern across my own three brands plus client engagements across Shopify wholesale, WooCommerce shops, WordPress content sites, and local businesses.

MISTAKE 1

Treating Branded as “they would have found us anyway”

🩺 THE SYMPTOM

A junior media buyer or agency contact sees 8–15Γ— ROAS on Branded Search and recommends pausing it because “those customers would have searched for us anyway”. Three weeks later total revenue drops in a way that does not match the supposed savings. The “savings” never showed up.

Why this happens

Branded ROAS is high because the intent behind branded queries is buying intent, not browsing intent. The dashboard reads the high ROAS as easy money and assumes the demand would have arrived organically. Two things break that assumption: (1) competitor brand-bidding intercepts your buyer right before checkout if you are not present, and (2) last-click attribution makes branded look like demand harvesting when it is actually demand protection. Google Ads’s own documentation on branded campaigns describes branded as protective spend, not duplicative.

The fix

  • Split your Branded Search campaign into three buckets: Pure Name (your brand standalone), Product Stack (your brand + product term), and Defense (your brand + competitor term).
  • Read ROAS at the bucket level. Pure Name typically has the highest paper ROAS but the lowest incrementality. Product Stack is where high-intent buying lives.
  • Set a budget floor on Defense even if its ROAS looks lowest, because that bucket is what prevents competitors from owning your brand SERP.

πŸ“Œ TYPICAL COST WHEN MISSED

Stores I audit with this mistake unrecorded lose 3–8% of total revenue over a 30-day window when branded is cut. The Audit triages this in week 1.

MISTAKE 2

Reading Branded ROAS in isolation from promotional activity

🩺 THE SYMPTOM

Branded ROAS spikes to 14Γ— this month, dashboard looks fantastic, somebody on the team starts planning to “double down on brand investment”. Meanwhile a sister brand, an affiliate partner, or your own Klaviyo flow ran a major push the same window. The lift is not organic brand strength, it is paid-promo halo with a 1–3 day lag.

Why this happens

Branded search is downstream of any promotional activity inside the niche. When customers see a promo email, paid social ad, or partner content, they often Google the brand name before buying. Branded captures that pre-purchase verification step. If you read branded ROAS in isolation you mistake the halo for organic demand.

Branded clicks lift during a promo window +300% +150% baseline D-1 D0 promo D+1 D+2 D+3 D+5 D+7 +280% peak

The fix

  • Build a dashboard overlay that shows branded clicks vs the promo calendar. Any spike that lines up with a promo within 3 days is halo, not organic strength.
  • Decision rule: if branded spike correlates with promo, do not scale based on the spike. Scale based on the trailing 30-day baseline trend instead.
  • Pre-promo: bump branded budget cap by +50% the day before through 3 days after, so the campaign captures the halo instead of throttling at the cap.

πŸ“Œ TYPICAL COST WHEN MISSED

Mis-read branded halo leads operators to allocate 10–25% of branded budget incorrectly in the month following a major promo. Worse, the next budget review cuts the wrong campaign.

MISTAKE 3

Not bidding on competitor variations of your brand name

🩺 THE SYMPTOM

You check Google in incognito and search your brand name. A competitor’s ad sits above your organic listing. Their ad spends a few cents per click against your buyer’s intent. You spend nothing. You are losing a customer at the last touchpoint and the dashboard never tells you.

Why this happens

Competitors bid on your brand because the buyer intent is exceptionally high and their CPC for a converting click is low. As long as their CPA stays under their target, they will keep doing it. The defense is to outbid on your own brand SERP so their ad either does not show, or shows below your defense ad. Both Google and Meta’s advertising help centers (Google Ads on branded campaigns) cover this dynamic directly.

The fix

  • Run an incognito search for: your brand standalone, your brand + product, your brand + alternative (“vs”, “alternative”, “review”). Note every competitor ad that appears.
  • Create or expand a Defense ad group with exact + phrase match on your brand name, brand misspellings, and your brand + competitor patterns (“Brand X vs Brand Y”).
  • Use a strong defense ad copy with your USP front-loaded. Bid to take position 1 even if RPC looks expensive on paper, the real cost is the customer you lost, not the bid.

πŸ“Œ TYPICAL COST WHEN MISSED

Competitor impression share on your brand SERP routinely runs 15–30% when defense is missing. Each percentage point of intercepted traffic costs roughly your average CAC.

MISTAKE 4

Pausing Branded during inventory shortages

🩺 THE SYMPTOM

Your bestseller is out of stock. The instinct is to pause Branded so you do not send paid traffic to an OOS page. Two weeks later the Quality Score on the Branded campaign craters, your CPC climbs by 40%, and you spend the next month clawing the campaign back to baseline.

Why this happens

Pausing a long-running campaign loses accumulated Quality Score signal. Google’s auction model rewards consistent participation. When you re-enable, it treats the campaign closer to a new one. Meanwhile, the Defense use case for Branded does not depend on inventory at all, even when your bestseller is OOS, your brand homepage is still the best landing page for a brand search.

The fix

  • Never pause Branded entirely. Pause the OOS ad copy variants, redirect Branded traffic to the brand homepage or category page that has stock.
  • Push the OOS product’s keyword set into a low-bid holding state instead of paused, keeps history, prevents Quality Score reset.
  • Set up a real-time inventory + ad-sync alert (covered in our DTK case study) so the OOS-on-ad latency drops from 24 hours to under 2.

πŸ“Œ TYPICAL COST WHEN MISSED

A 2-week pause on Branded typically takes 4–6 weeks of recovery to return to prior Quality Score. CPC inflation during recovery costs 25–40% over baseline.

MISTAKE 5

Letting competitors sit on your brand SERP unchallenged

🩺 THE SYMPTOM

Search your brand name. You see your ad. Below it: competitor ad. Below that: your organic listing. Below that: review sites with affiliate links to competitors. None of it surprises you anymore. Then revenue drops and nobody can pinpoint why.

Why this happens

A brand SERP is real estate. You only “own” the top ad slot and the organic listing position 1 (sometimes). Everything else can be sold, captured, or rented out from under you. Review sites with affiliate revenue routinely push their preferred partner above your brand listing if you do not actively maintain the SERP.

The fix

  • Audit your brand SERP monthly. Note every ad, every review site, every competitor presence.
  • Reach out to review sites with affiliate links to competitors and offer your own program, most will take it.
  • Run a defense ad group that targets your brand + “vs”, “review”, “alternative” queries with copy that directly addresses the comparison.
  • Apply for sitelinks and structured snippets on the Branded campaign. Google Ads documents sitelink eligibility and best practice here. A full sitelink + callout pack effectively owns your brand SERP from impression to click.

πŸ“Œ TYPICAL COST WHEN MISSED

An unmaintained brand SERP routinely loses 10–20% of branded organic traffic to review-site interception over 12 months. The traffic was already yours, you just stopped defending it.

πŸ“‹ QUICK AUDIT CHECKLIST

Run this on your account this week

  1. Search your brand in incognito. List every ad on the SERP.
  2. Pull a 90-day Search Terms report on your Branded campaign. Bucket queries into Pure Name / Product Stack / Defense. Compute ROAS per bucket.
  3. Overlay your branded clicks against your promotional calendar for the same 90 days. Flag any spike that correlates with a promo within 3 days.
  4. Check Auction Insights for your Branded campaign. Note competitor impression share and overlap rate.
  5. Verify your branded campaign has at least 4 sitelinks, 4 callouts, and structured snippets approved and serving.
  6. Compute branded campaign Quality Score. If it has dropped in the last 30 days, identify the day it dropped and what change preceded it.

FREQUENTLY ASKED

Common questions about branded search

How do I know if my branded ROAS is real or padded?

Split the Search Terms report into Pure Name, Product Stack, and Defense buckets. Pure Name ROAS is typically inflated by last-click attribution (the customer was going to convert anyway). Product Stack ROAS is more incremental because the buyer is researching a specific product within your brand. Defense ROAS often looks low but the value is in the intercepted traffic, not direct revenue. Read each bucket separately, never the campaign average.

Should small WordPress or local business sites even run Branded campaigns?

Yes, if any of these are true: competitors are bidding on your brand, you have a memorable brand name people Google by name, or you depend on organic discovery being routed correctly. The CPC for branded queries is usually low because Quality Score is high. Even a $50/month branded budget can be defensive infrastructure rather than wasted spend. For local businesses especially, branded + “near me” patterns are a near-zero-CPC channel many operators skip.

How much should I budget for Branded vs Non-Branded?

Set Branded to capture 100% of available branded impressions with reasonable cost cap (usually 5–10% of total paid spend). Anything that does not max out is leakage. Non-Branded gets the remainder. The mistake is treating them as a 50/50 pie split and rationing Branded when Non-Branded over-performs. Branded is defensive infrastructure; Non-Branded is offensive acquisition. Budget them separately, never against each other.

What does the 7-day Audit actually deliver on Branded?

During the Audit I run the 6-step checklist above plus a sister-brand audit if you have one, Auction Insights extraction, sitelink and asset review, Quality Score timeline, and the bucket-level ROAS computation. The deliverable is a prioritized fix queue: which mistake to address first, what each fix is expected to recover, and the exact ads-manager actions to take. You get the playbook whether or not we continue to a sprint.

Recognize 2 or 3 of these in your own account?

The 7-day Audit ($2,500 flat) walks through your Branded campaign with this exact framework, plus your Search Terms, your Auction Insights, your sitelinks, and your competitive SERP. You get a 30-50 page PDF + Loom walkthrough whether or not we continue.

See engagement tiers β†’